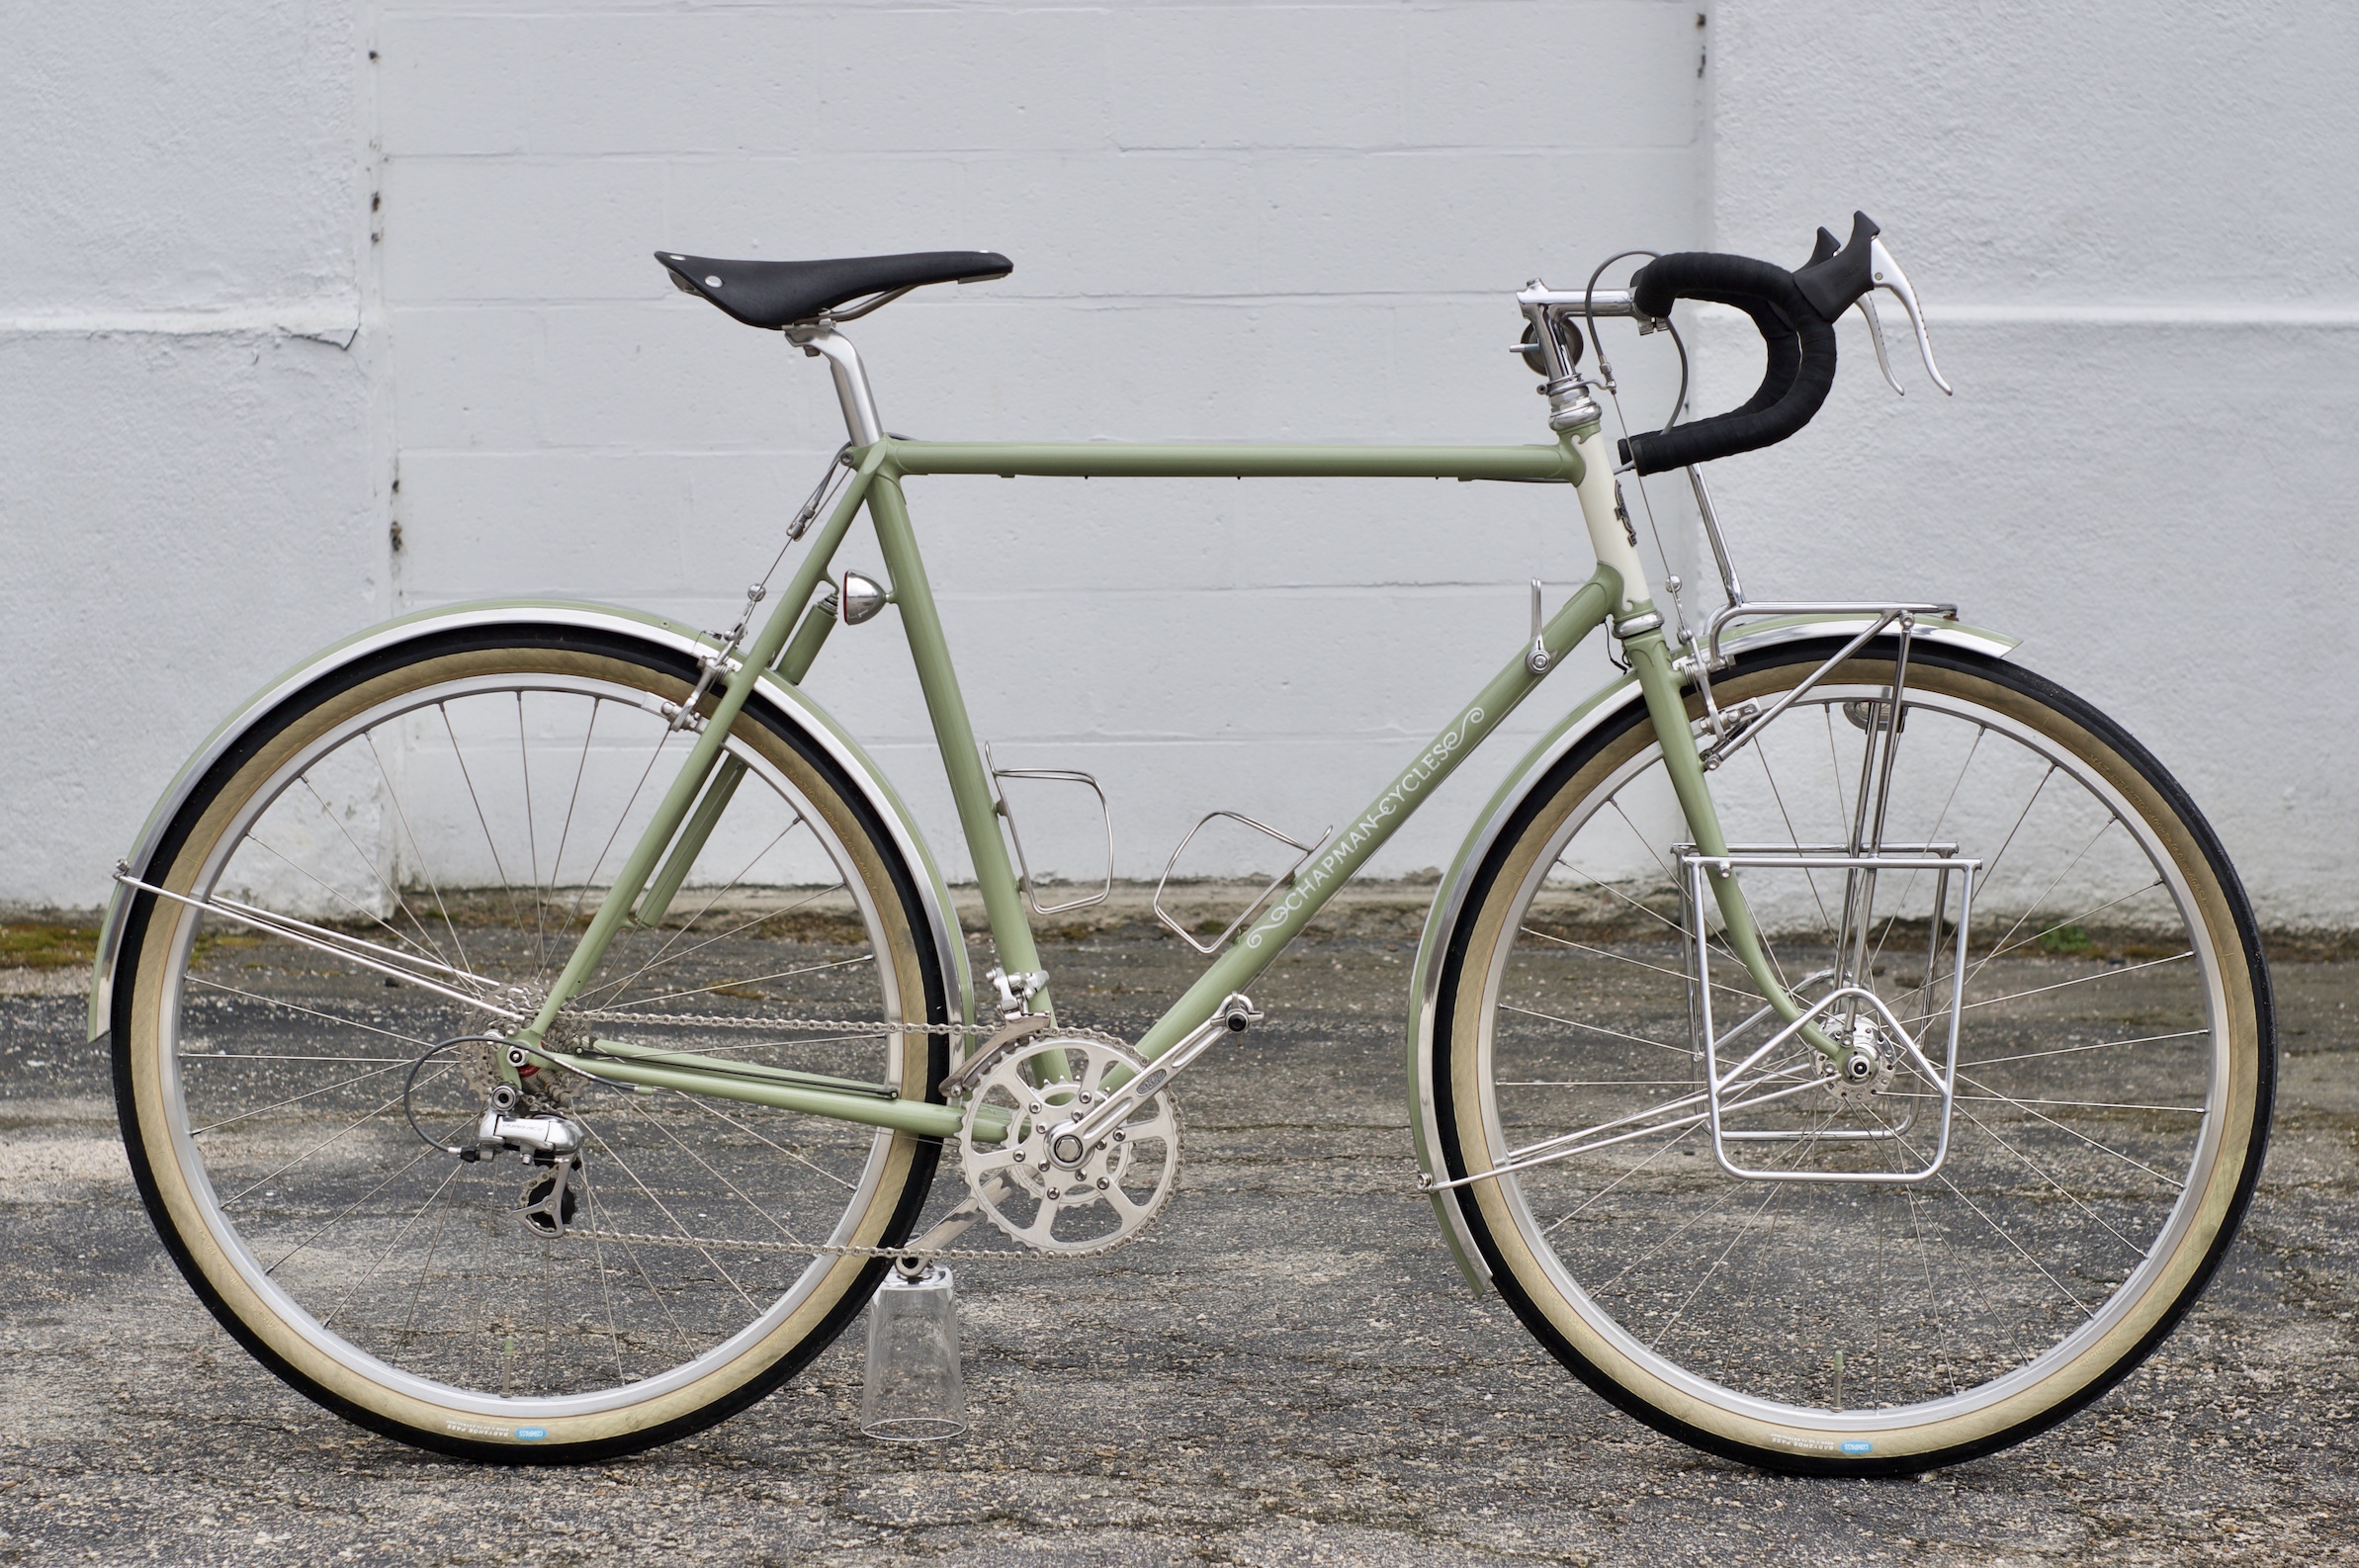
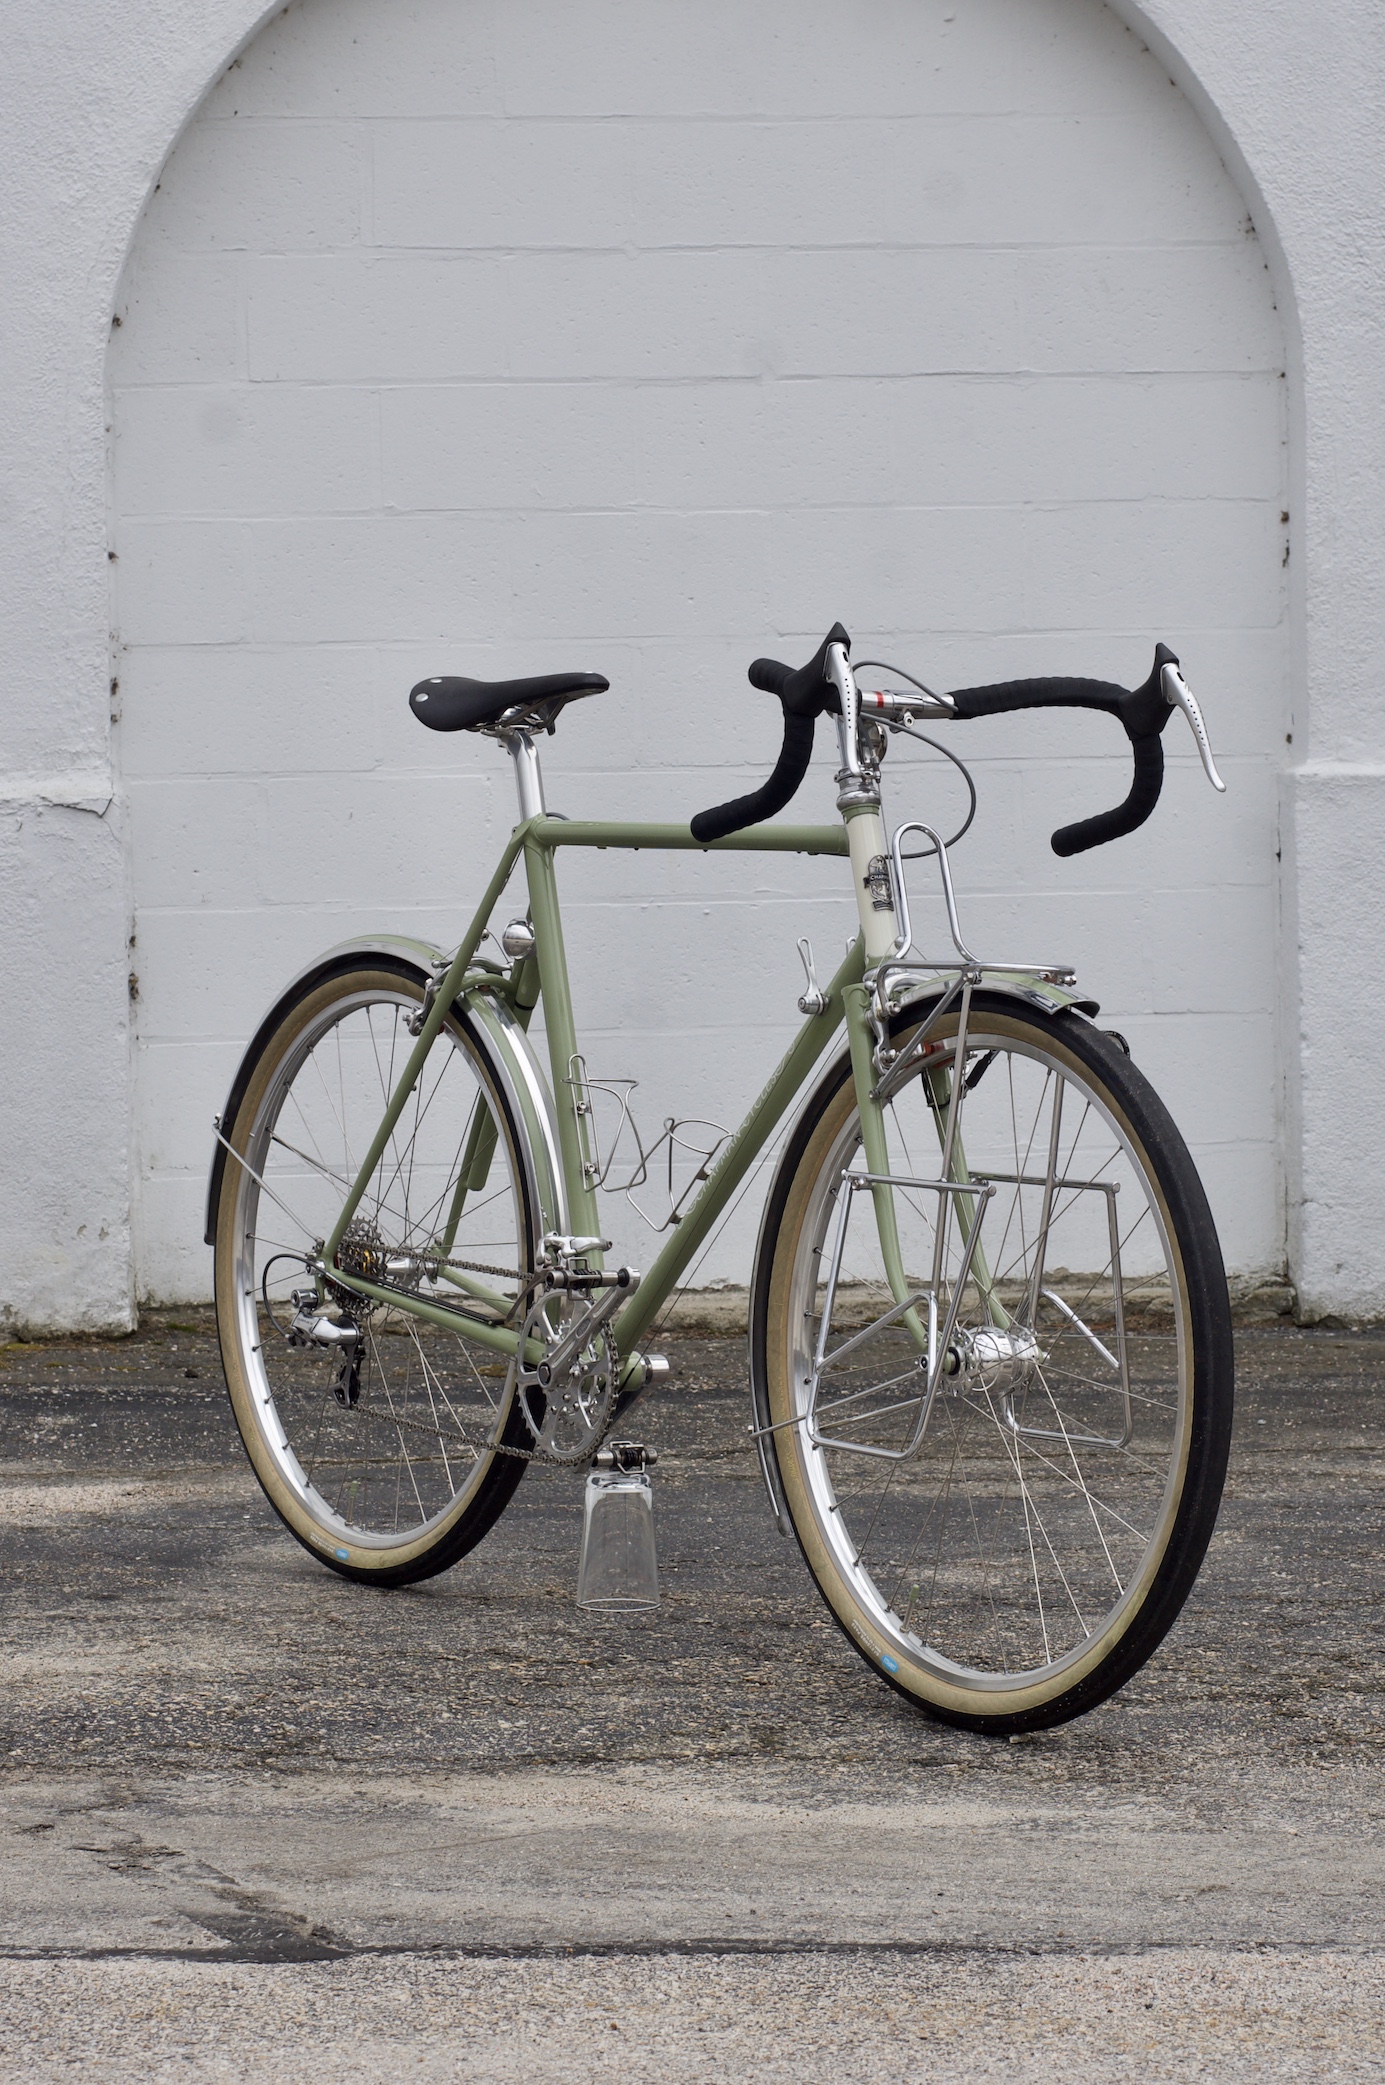
June’s rinko randonneur
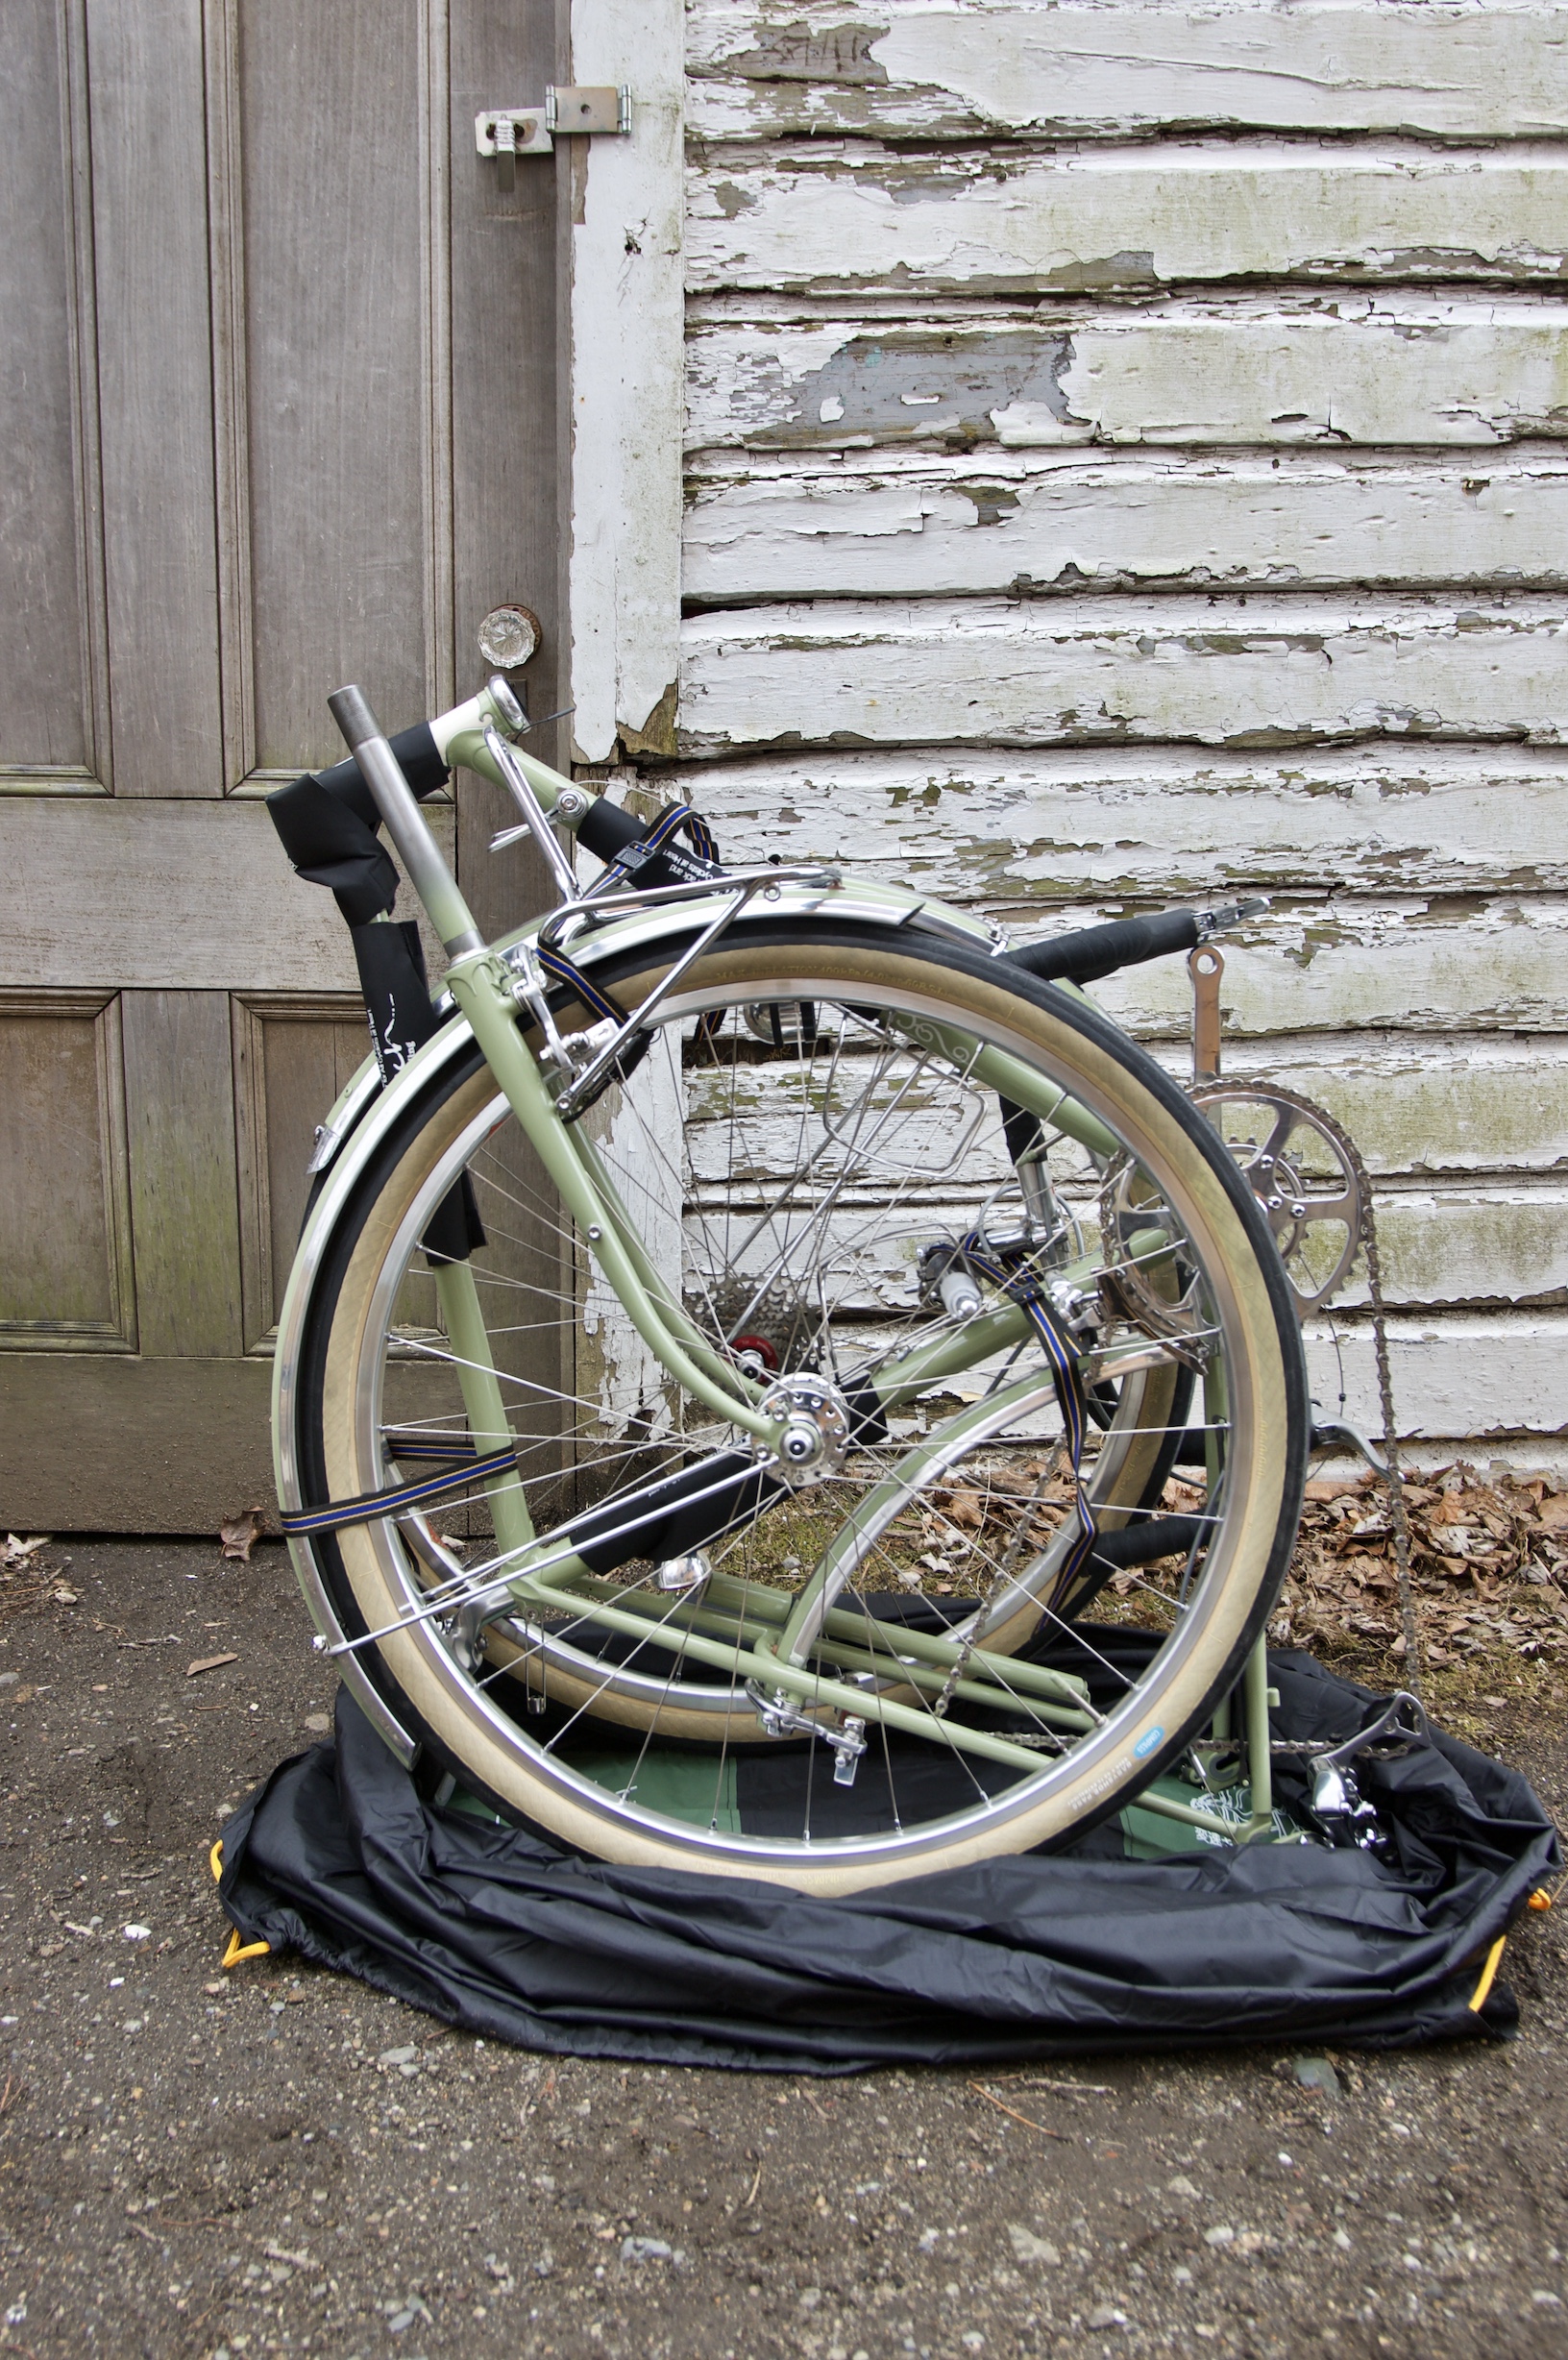
I started working on June’s rinko bike in late 2019, if my memory serves me correctly. It was one of those bikes that I knew was going to be a challenge for me. I had never done a rinko travel bike but I had seen many other builders do them. I liked the concept even though the actual use for traveling might be minimal.
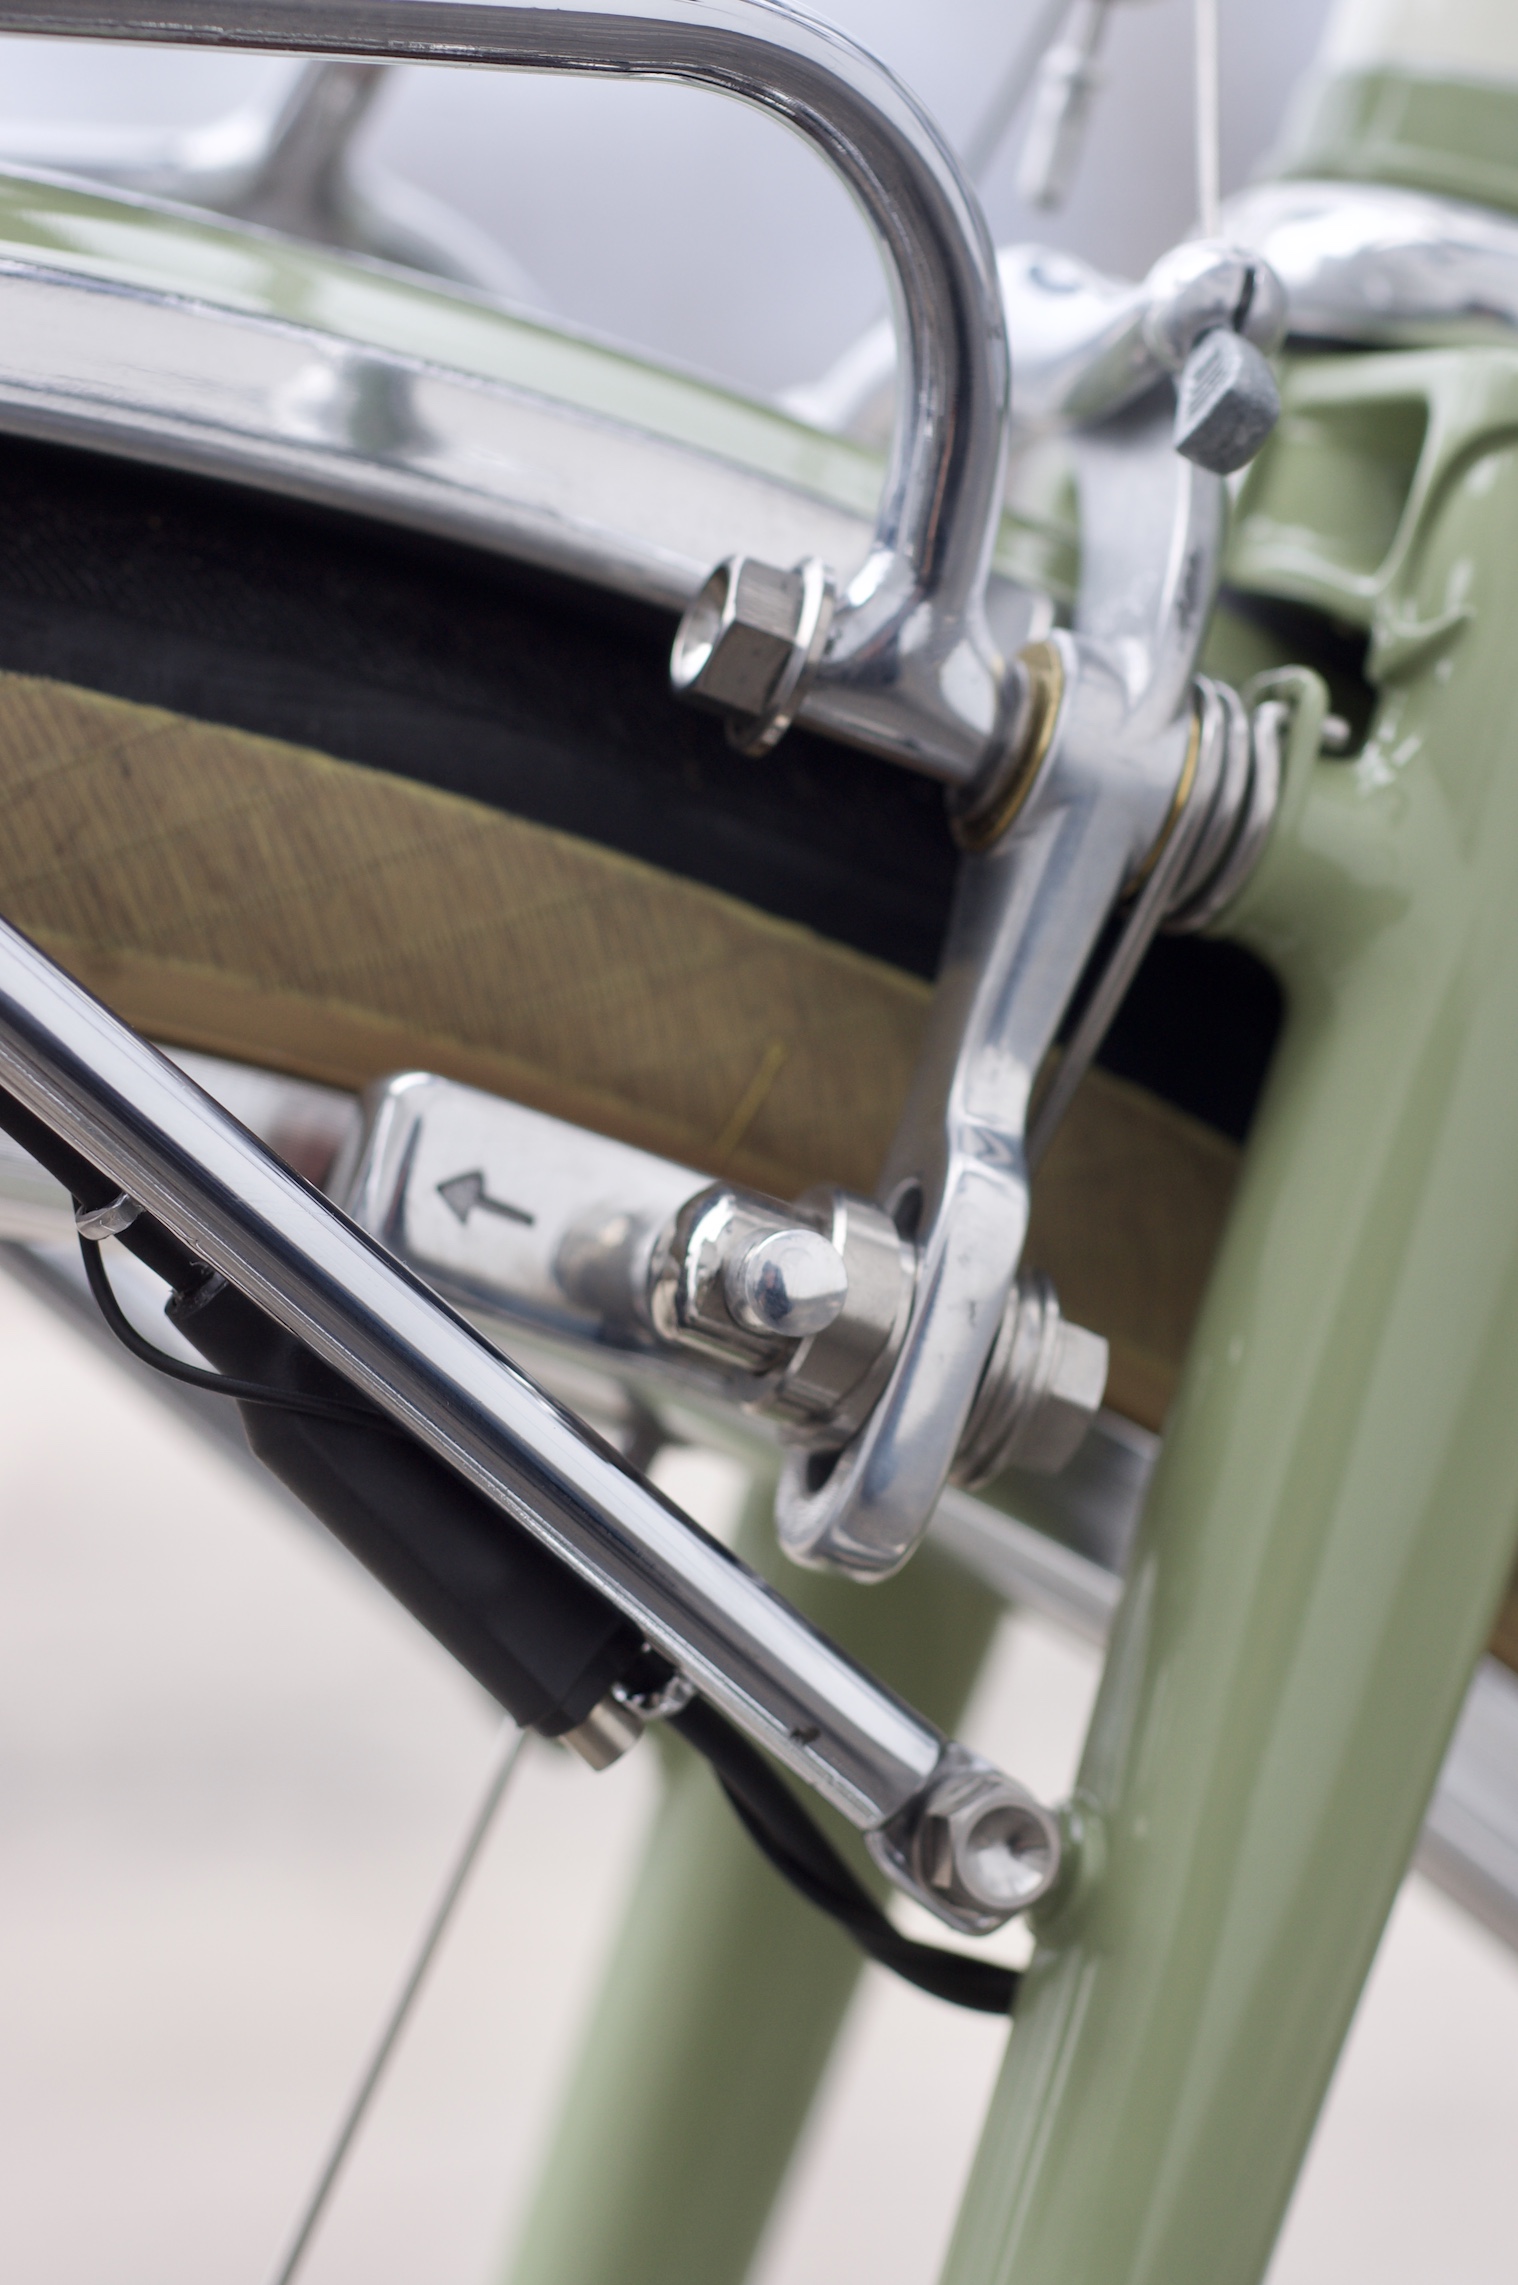
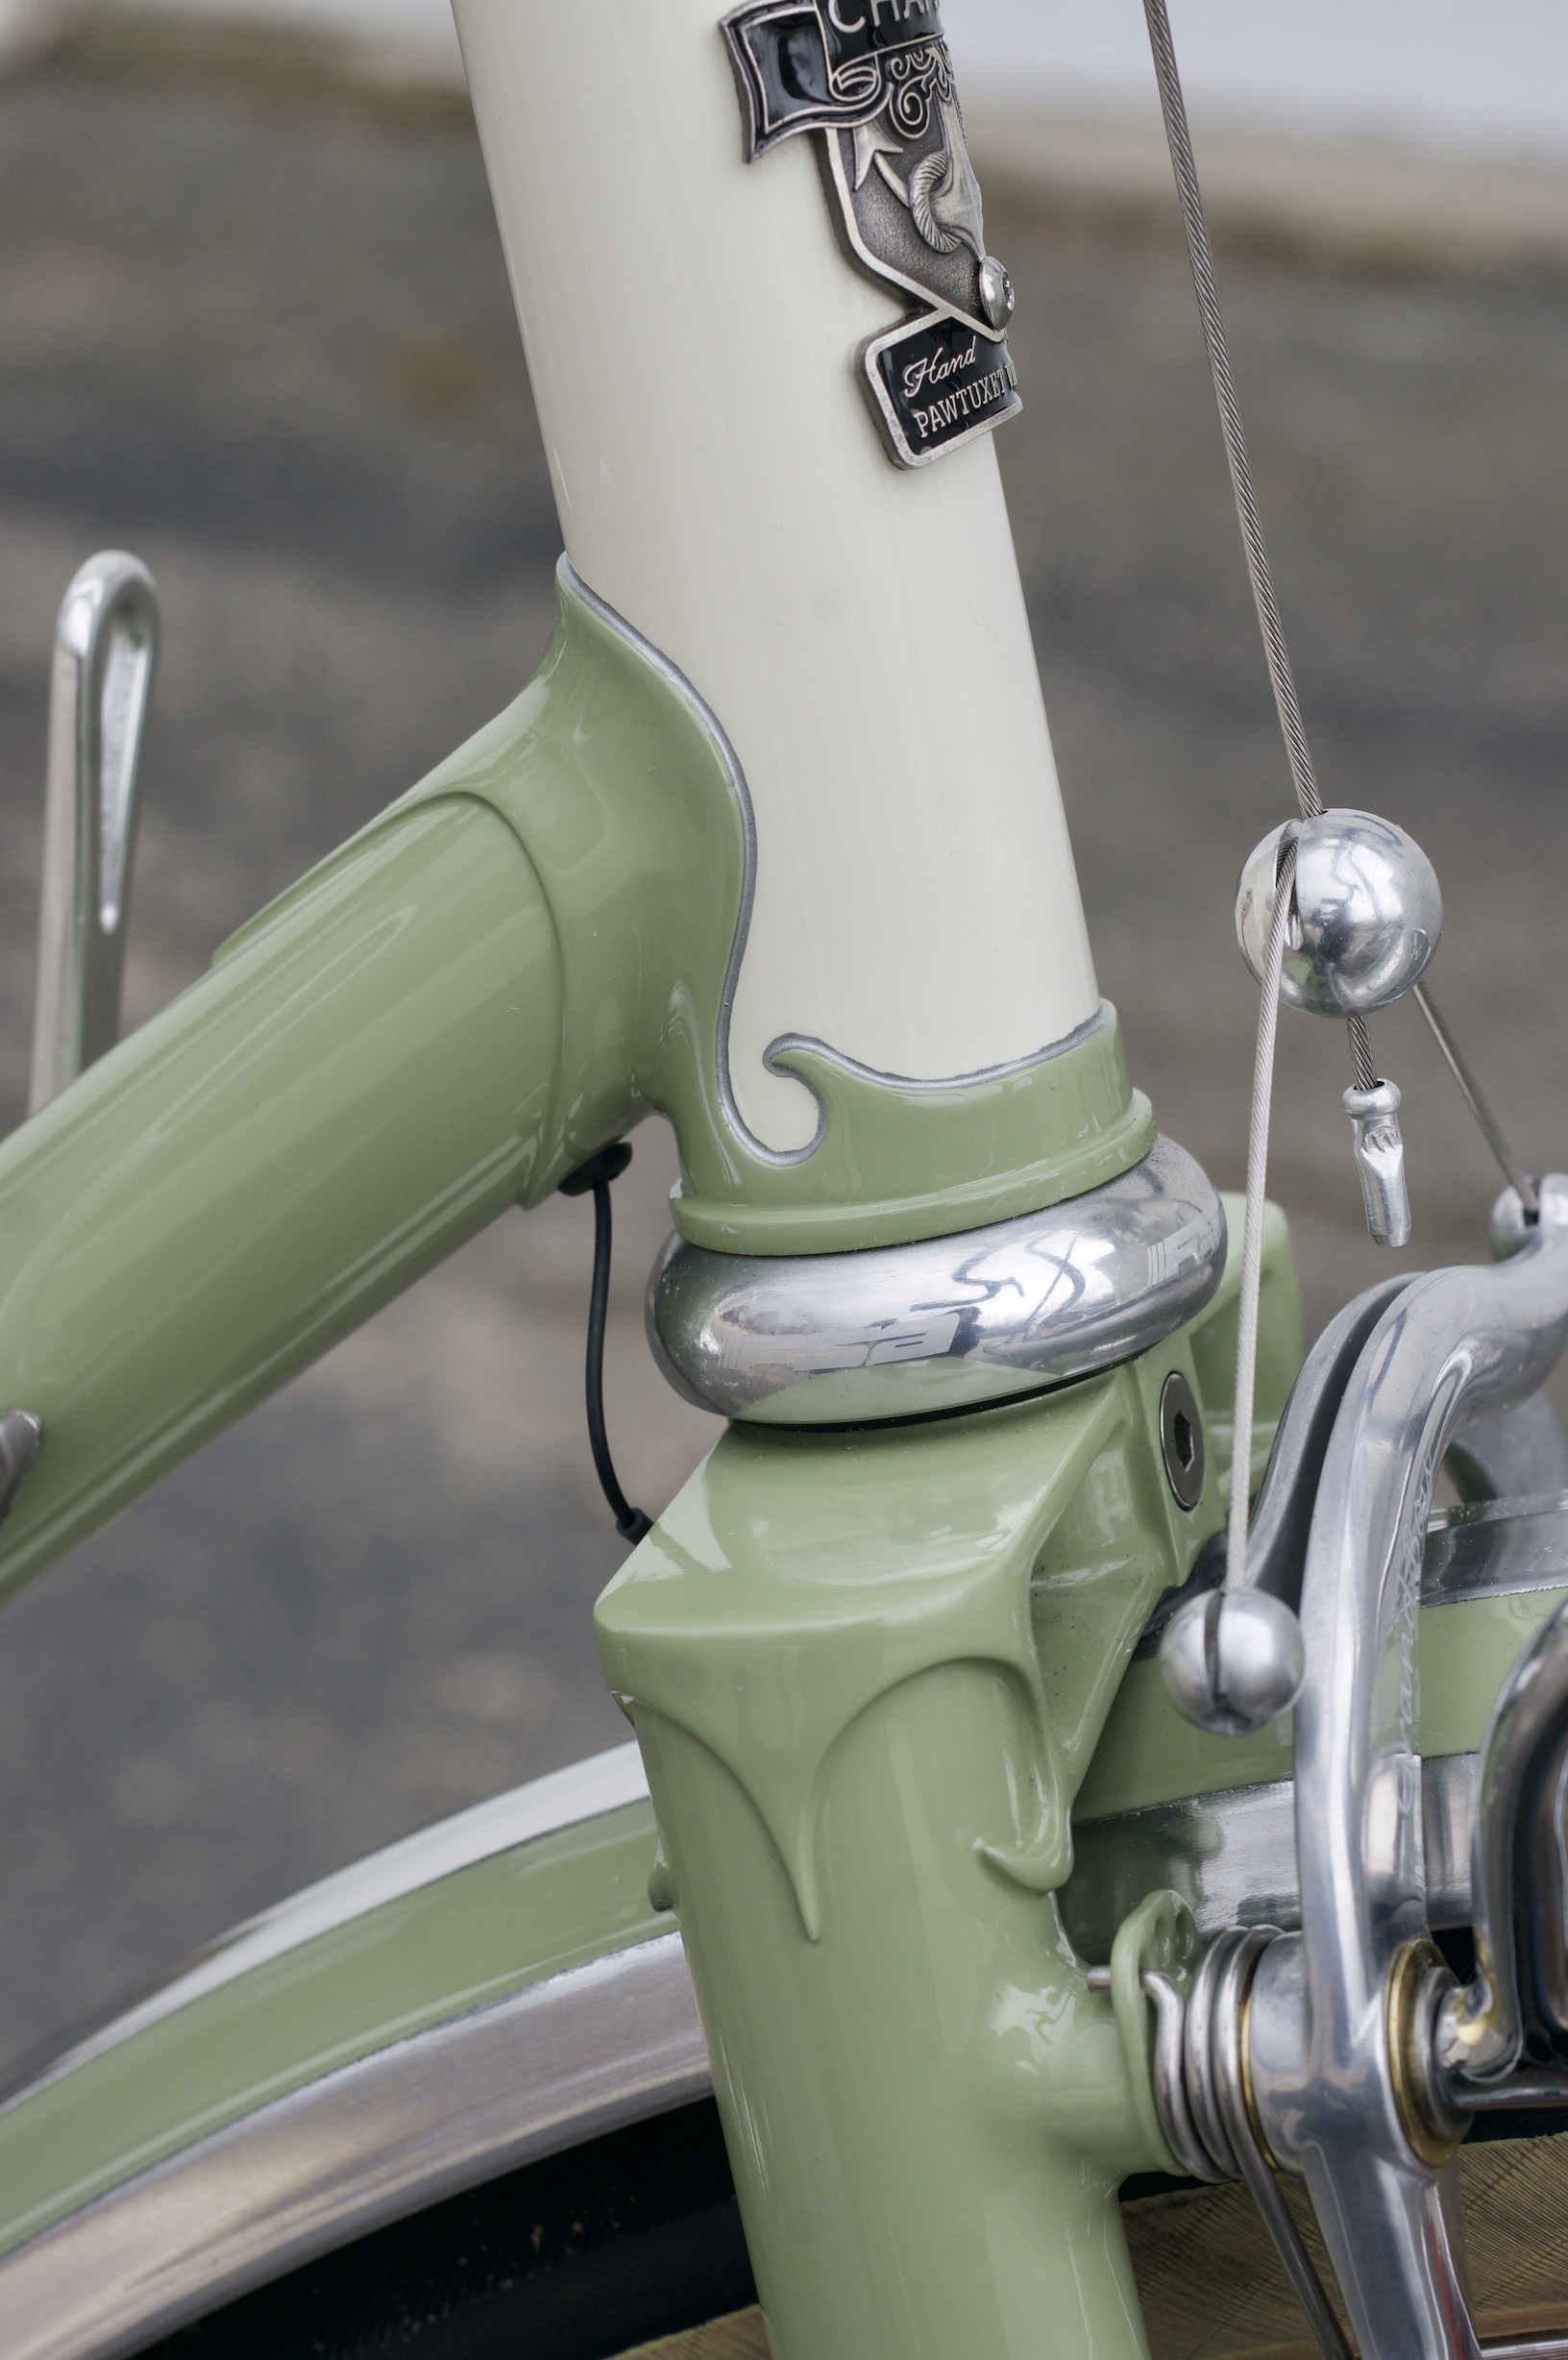
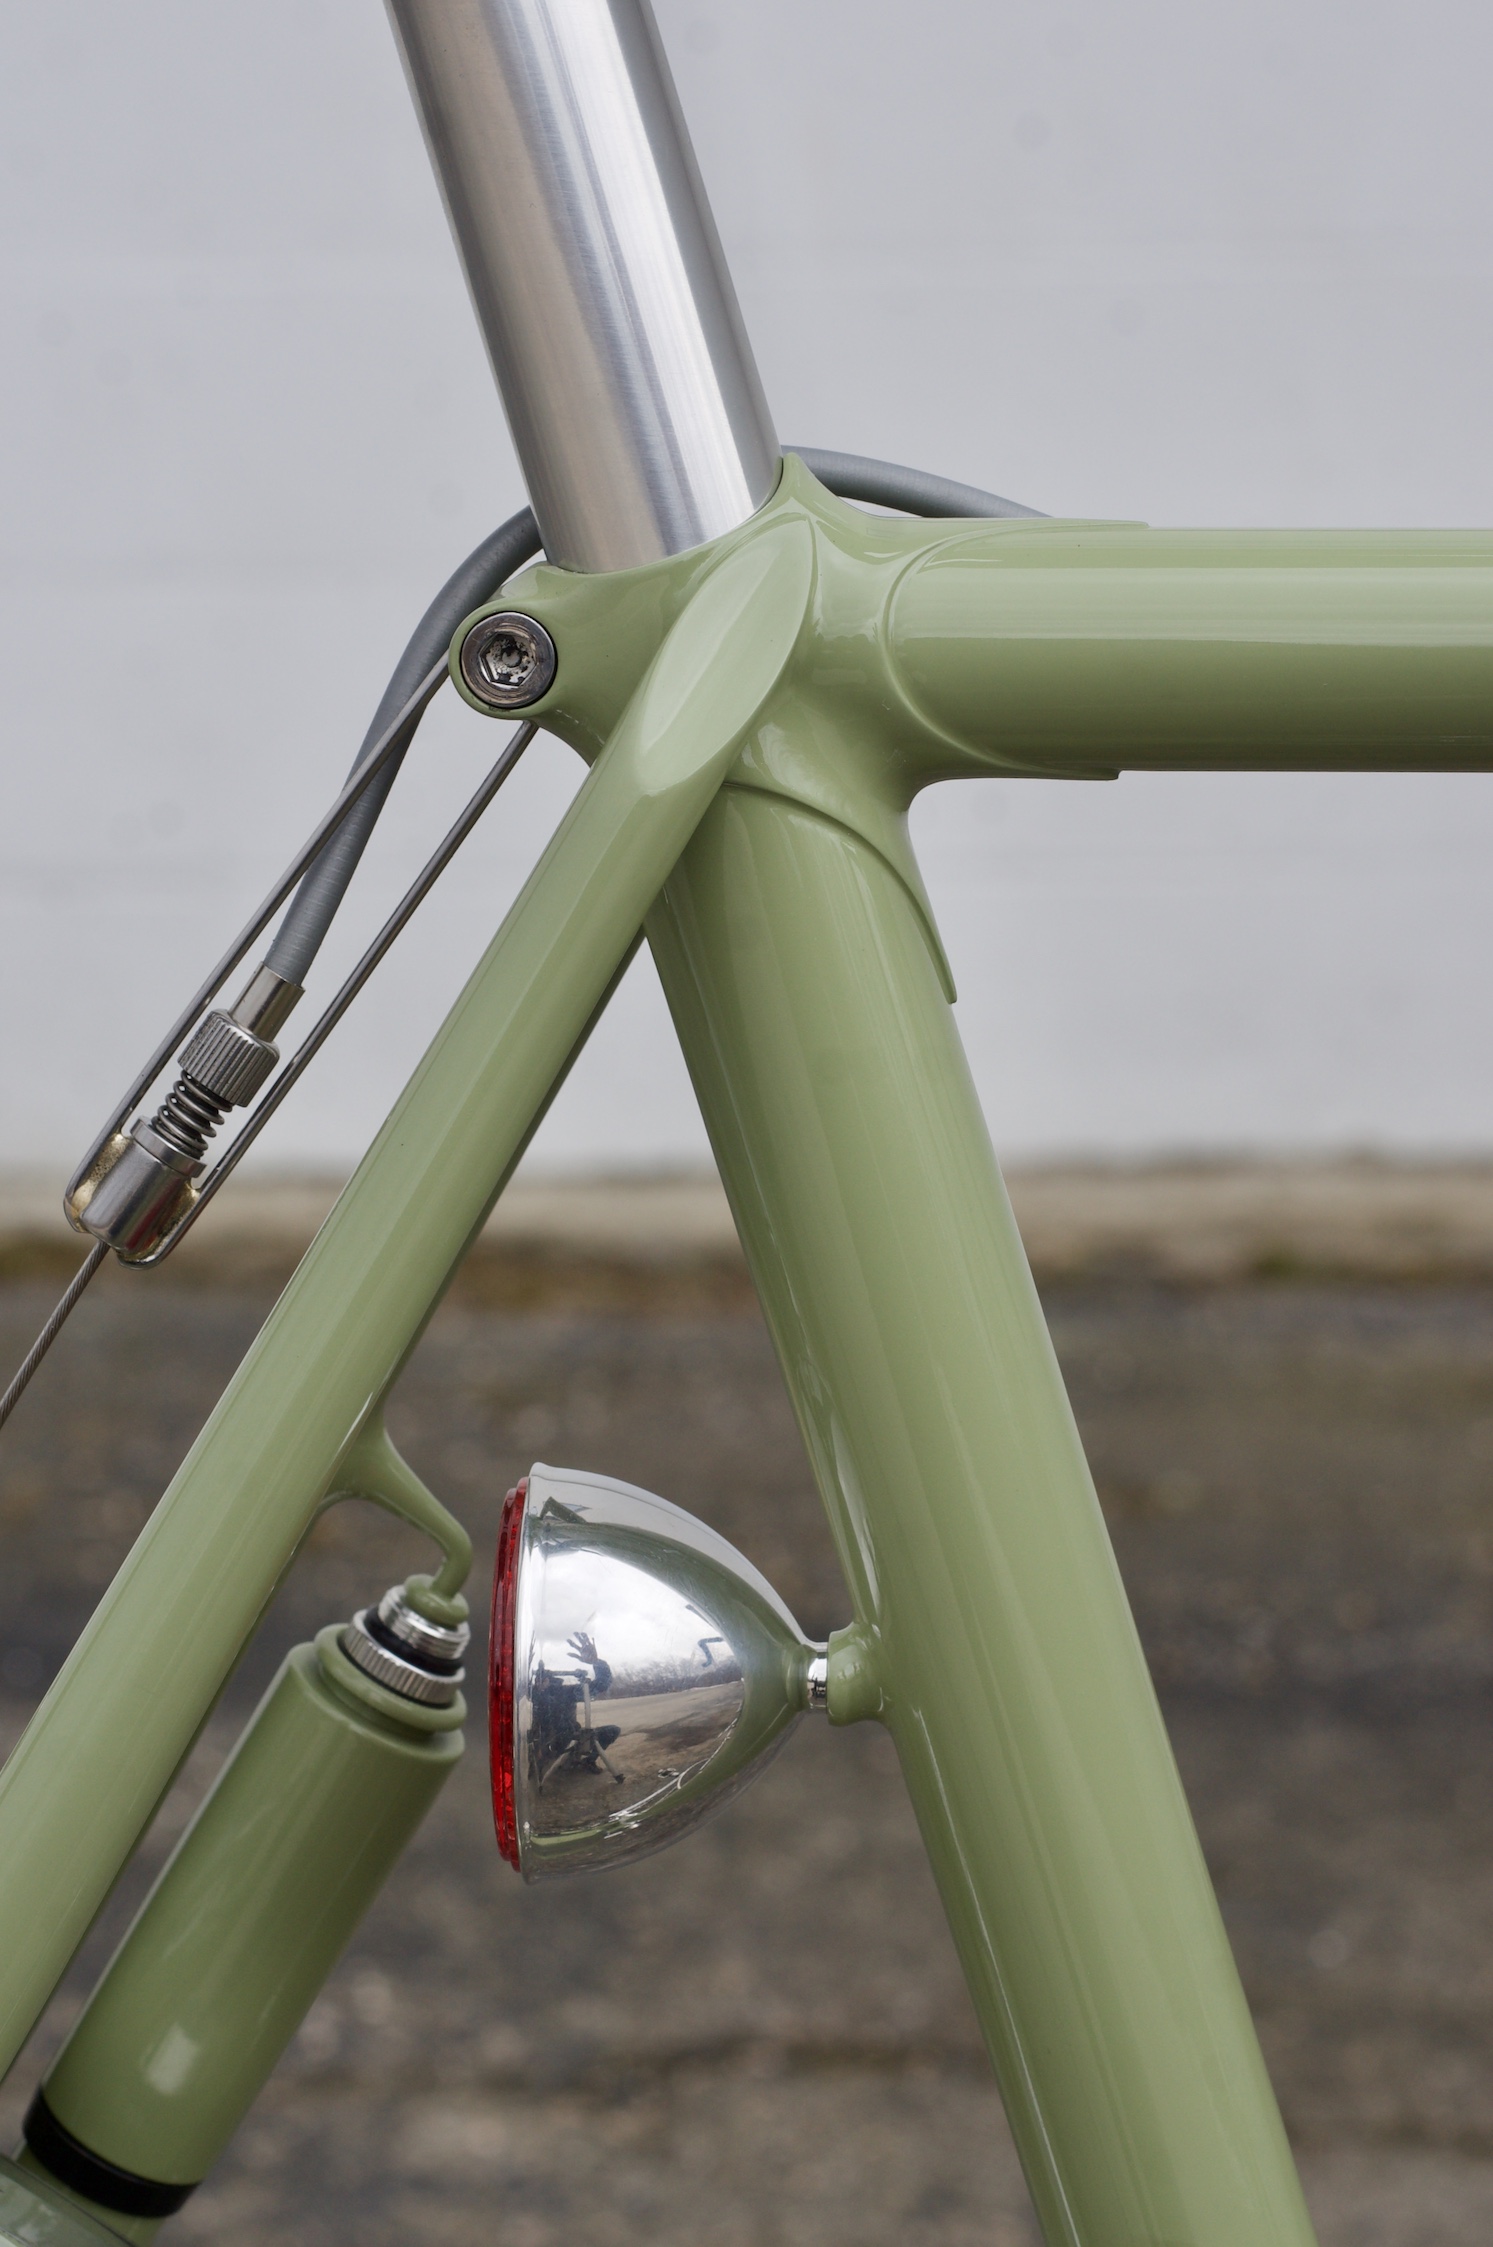
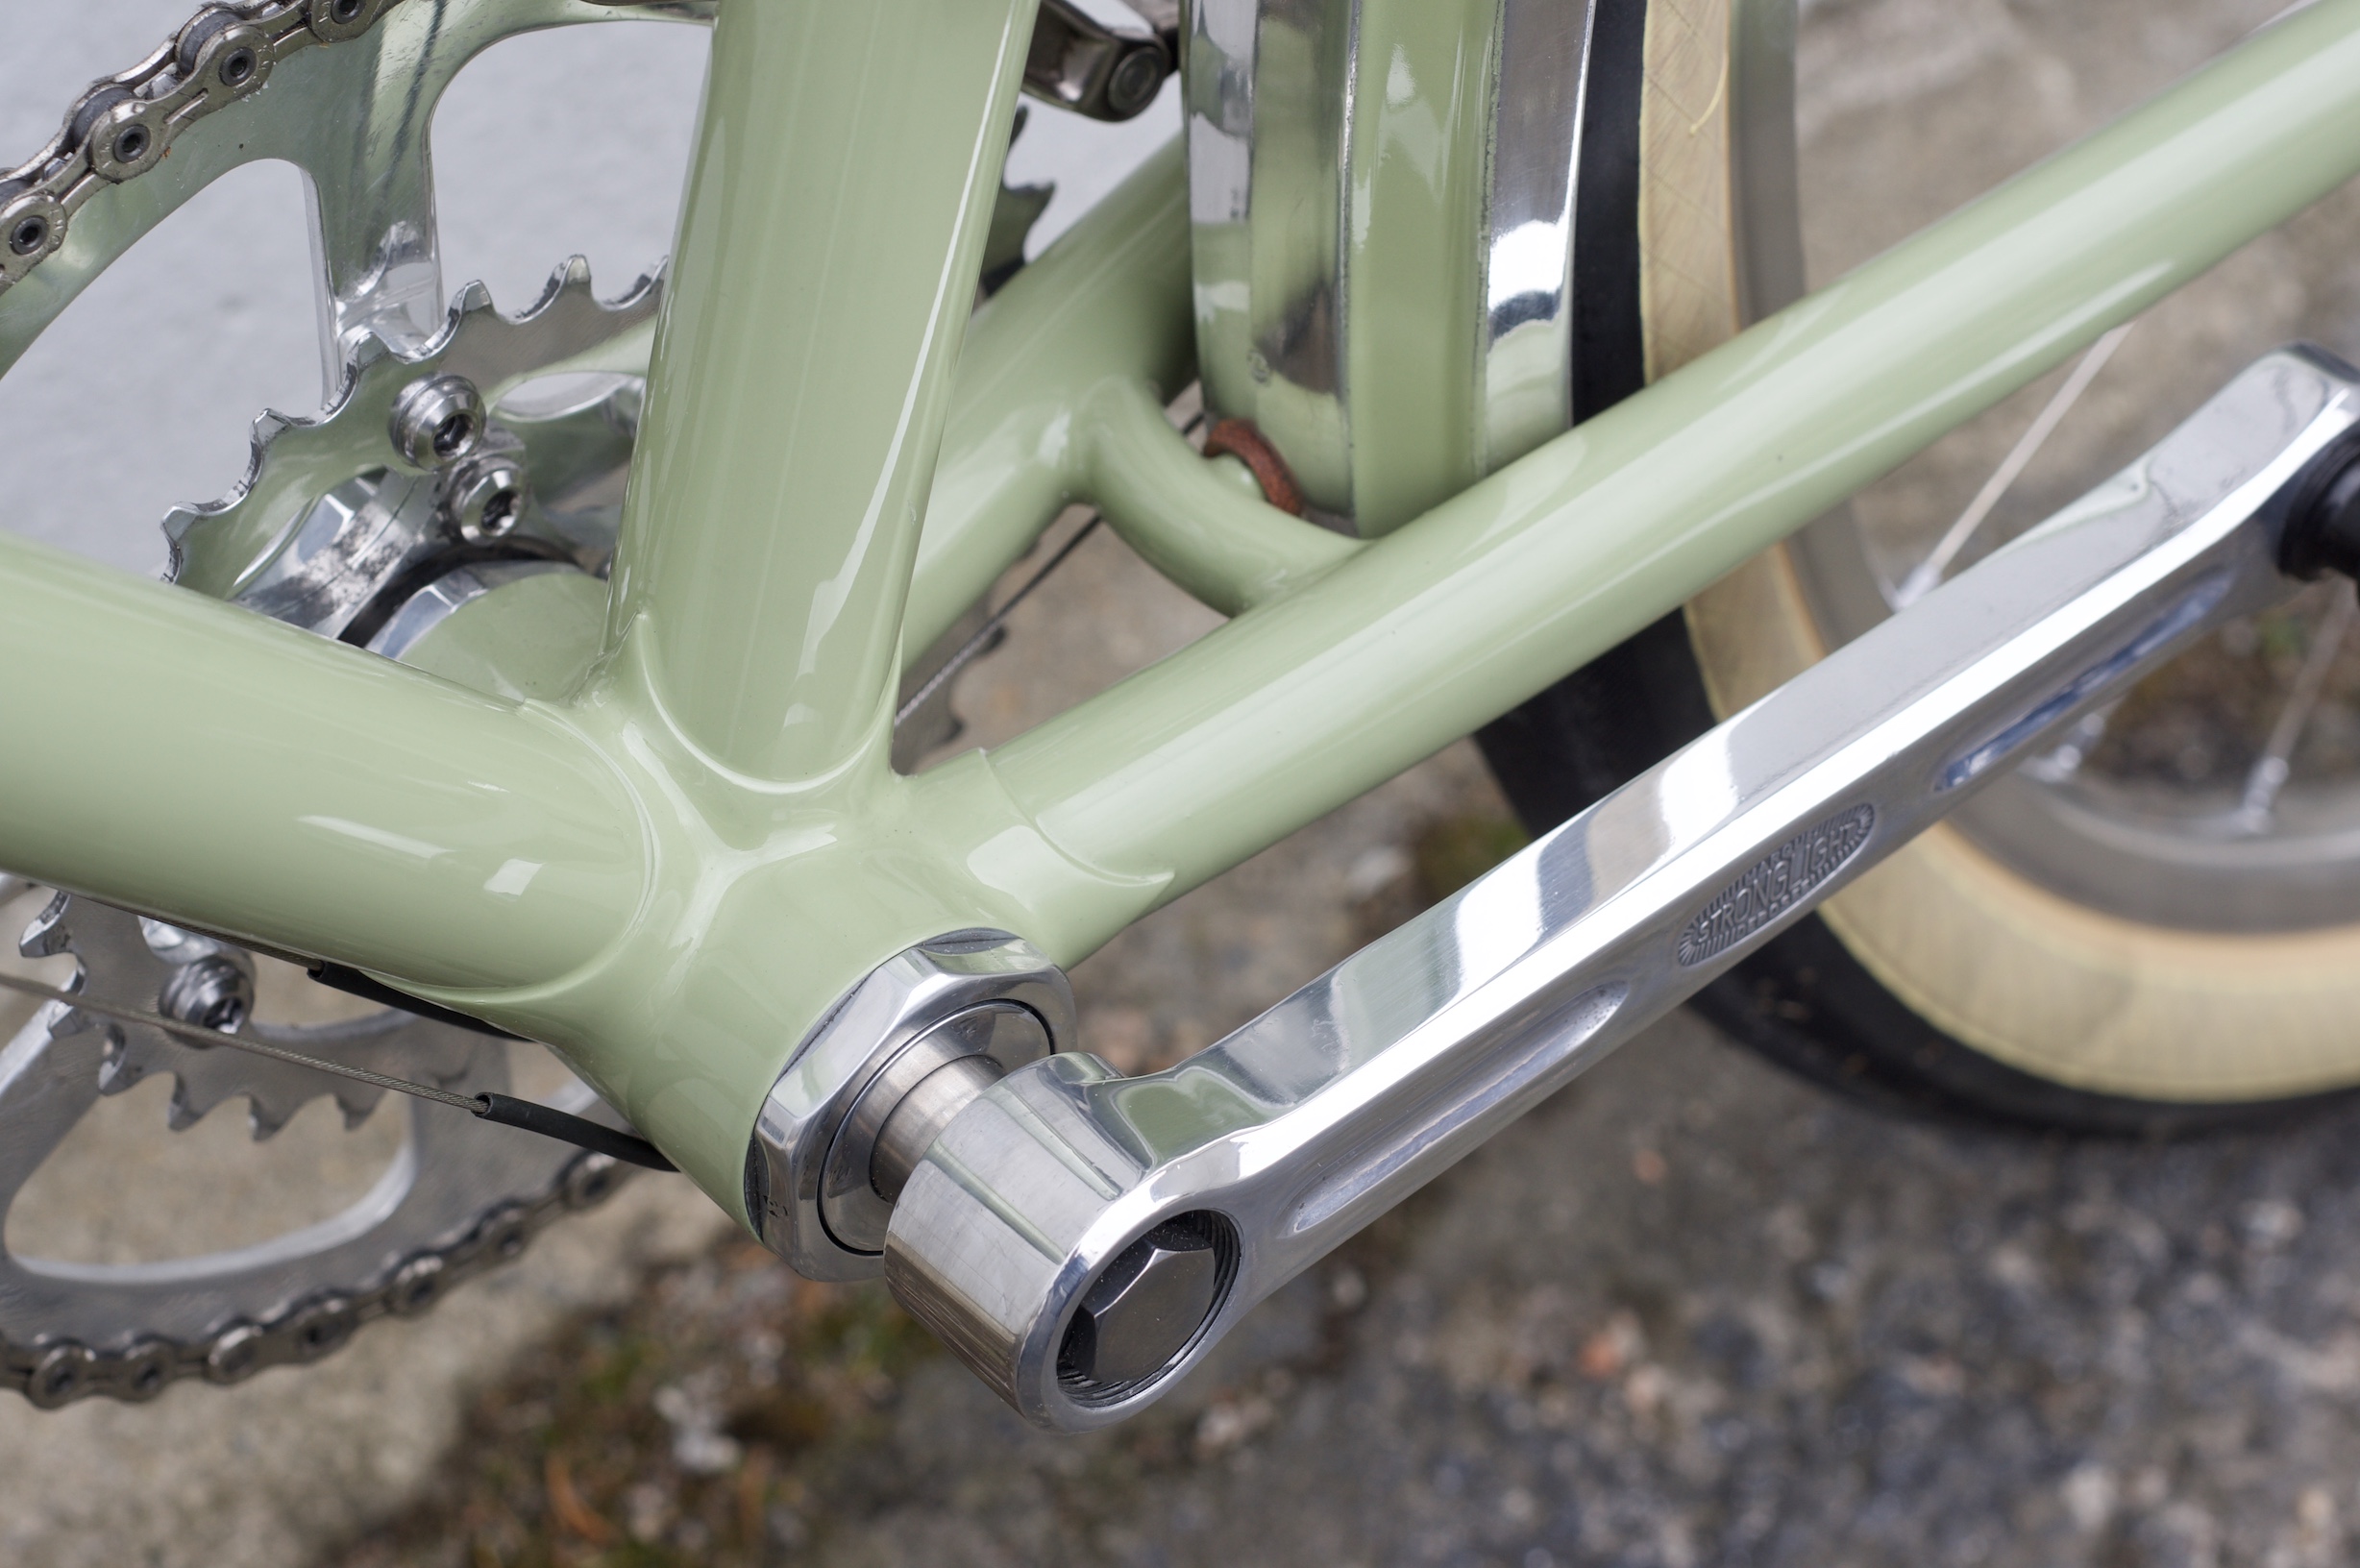
I tried to address some of the normal issues of travel bikes but primarily focused on preventing wear on the finish. I didn’t want paint chipping off the back of the rear dropouts so I made a set of tiny stainless “shields”. They mount to the extra set of eyelets on the Suntour dropouts and rest on the ground when “rinko’d”.
Other small details include
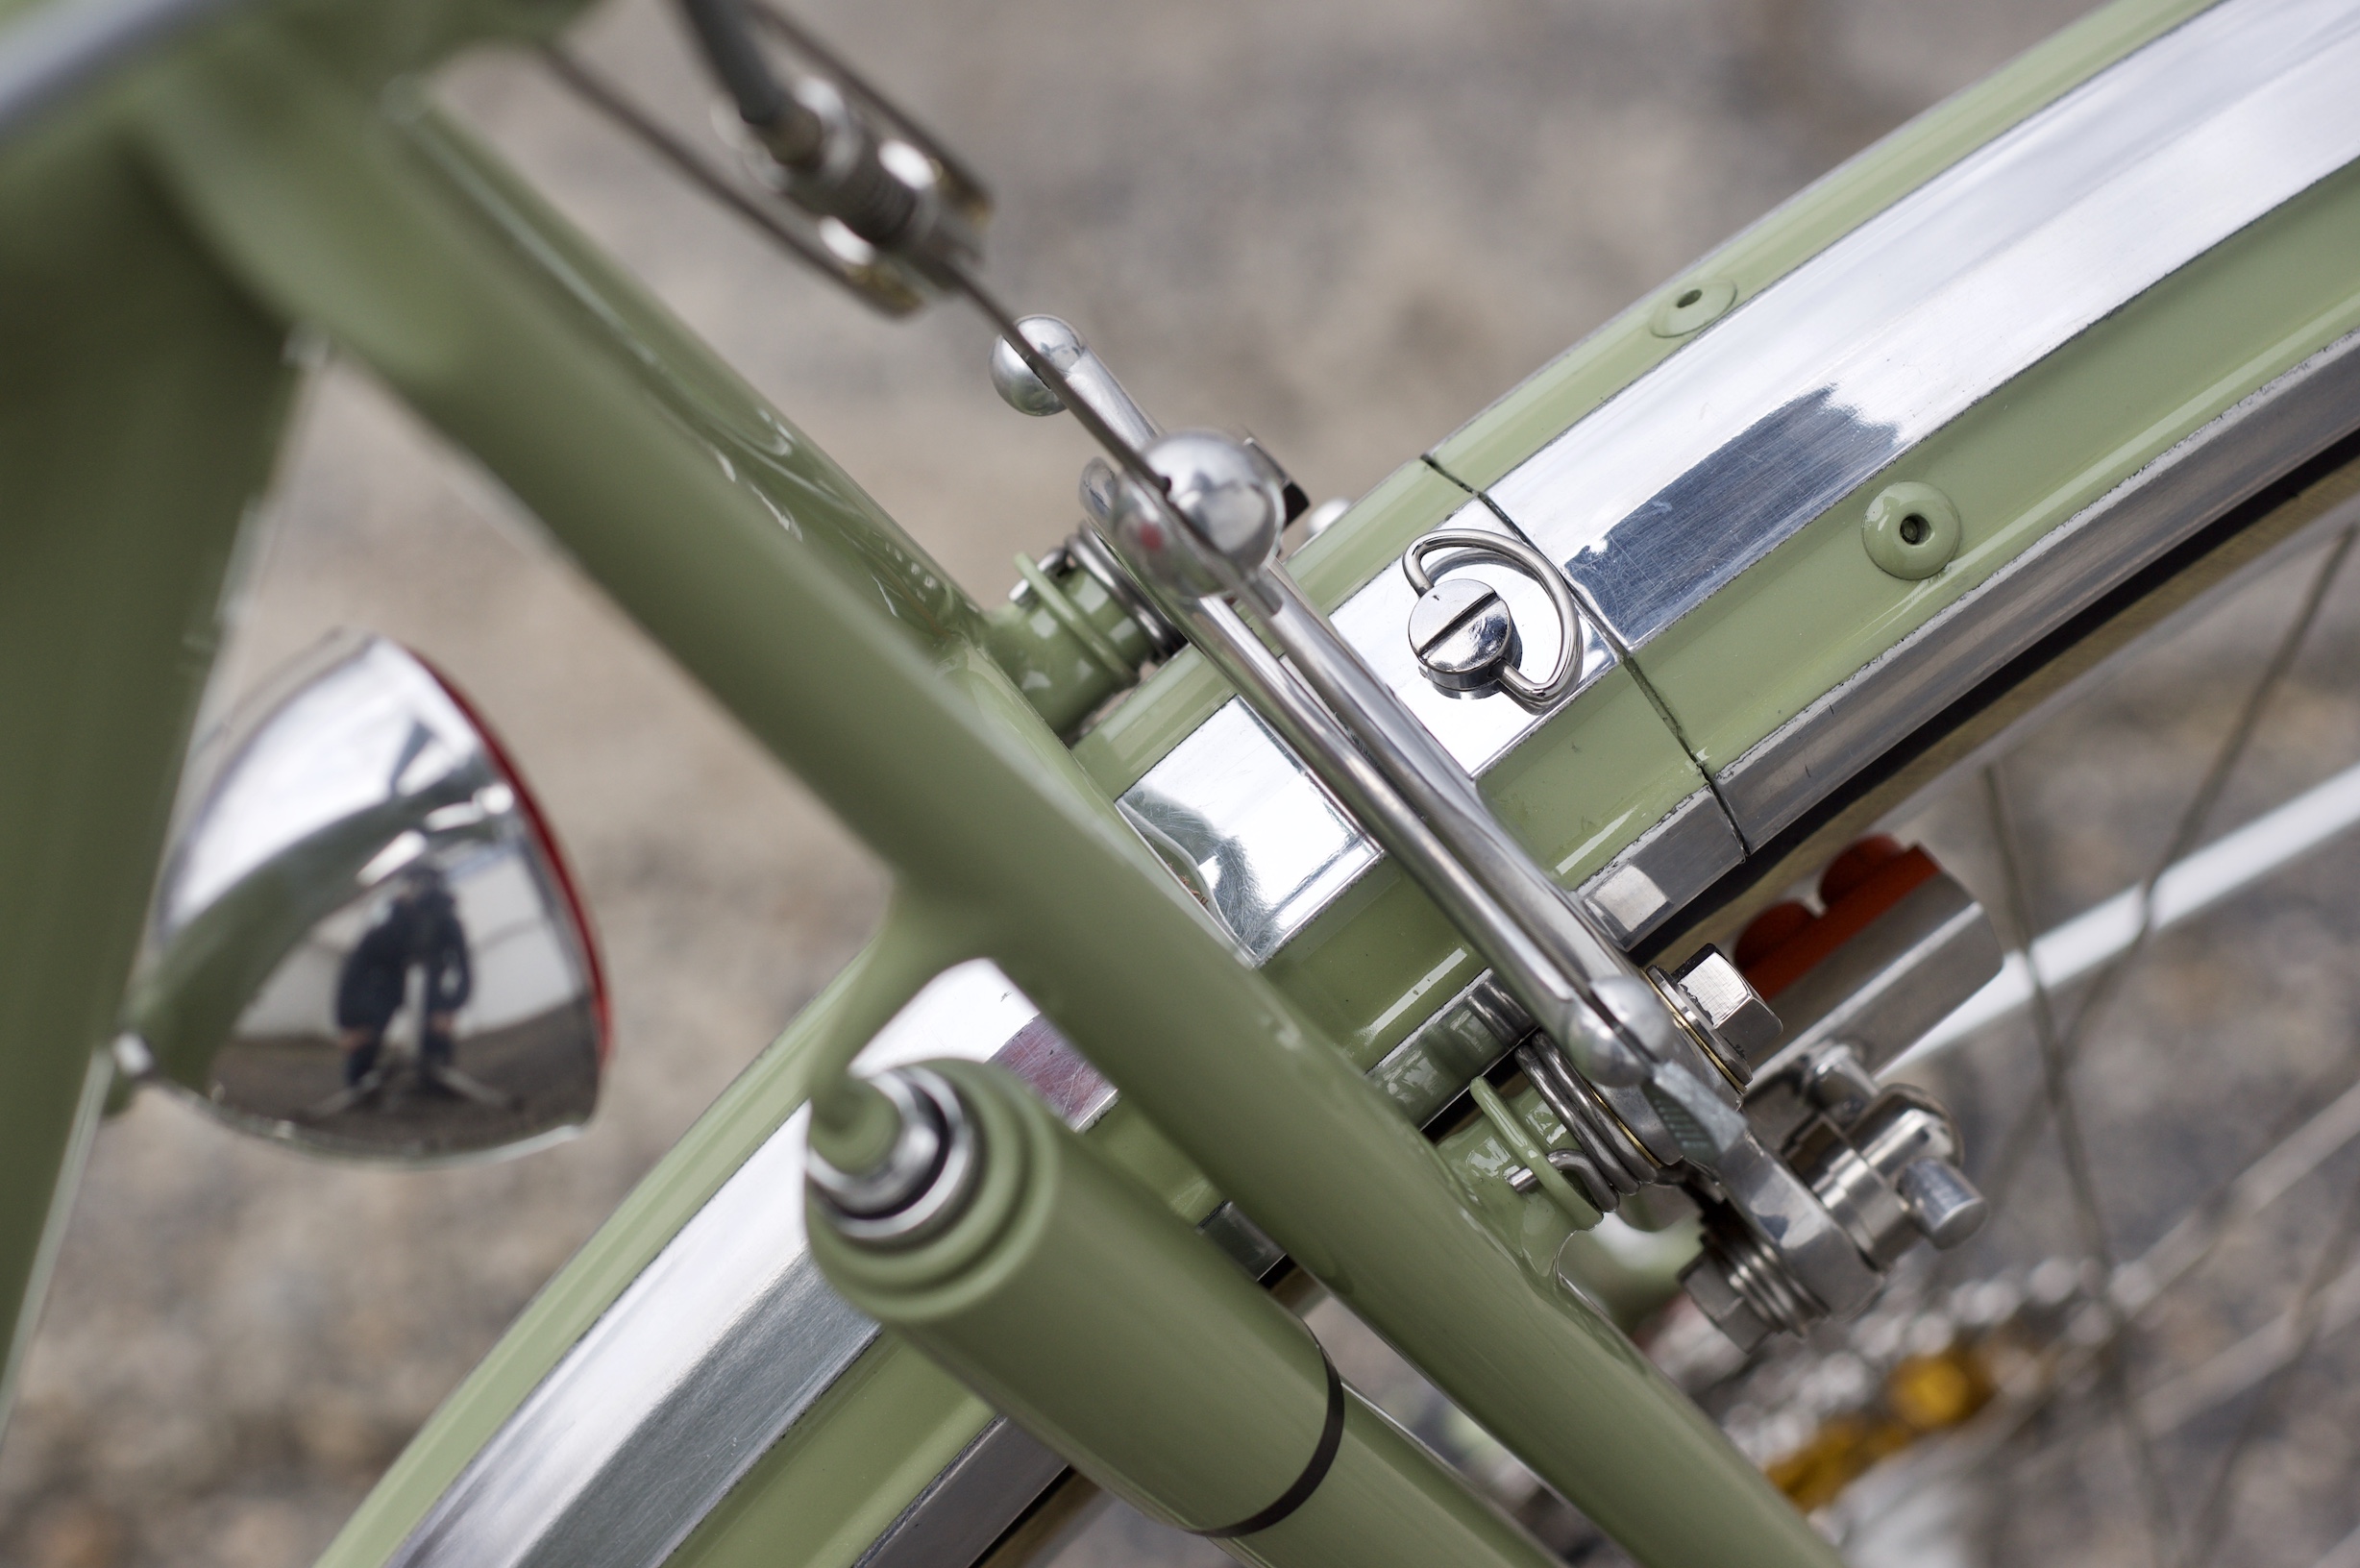
- A high chain hanger to have the chain tension keep the rear derailleur from touching the ground.
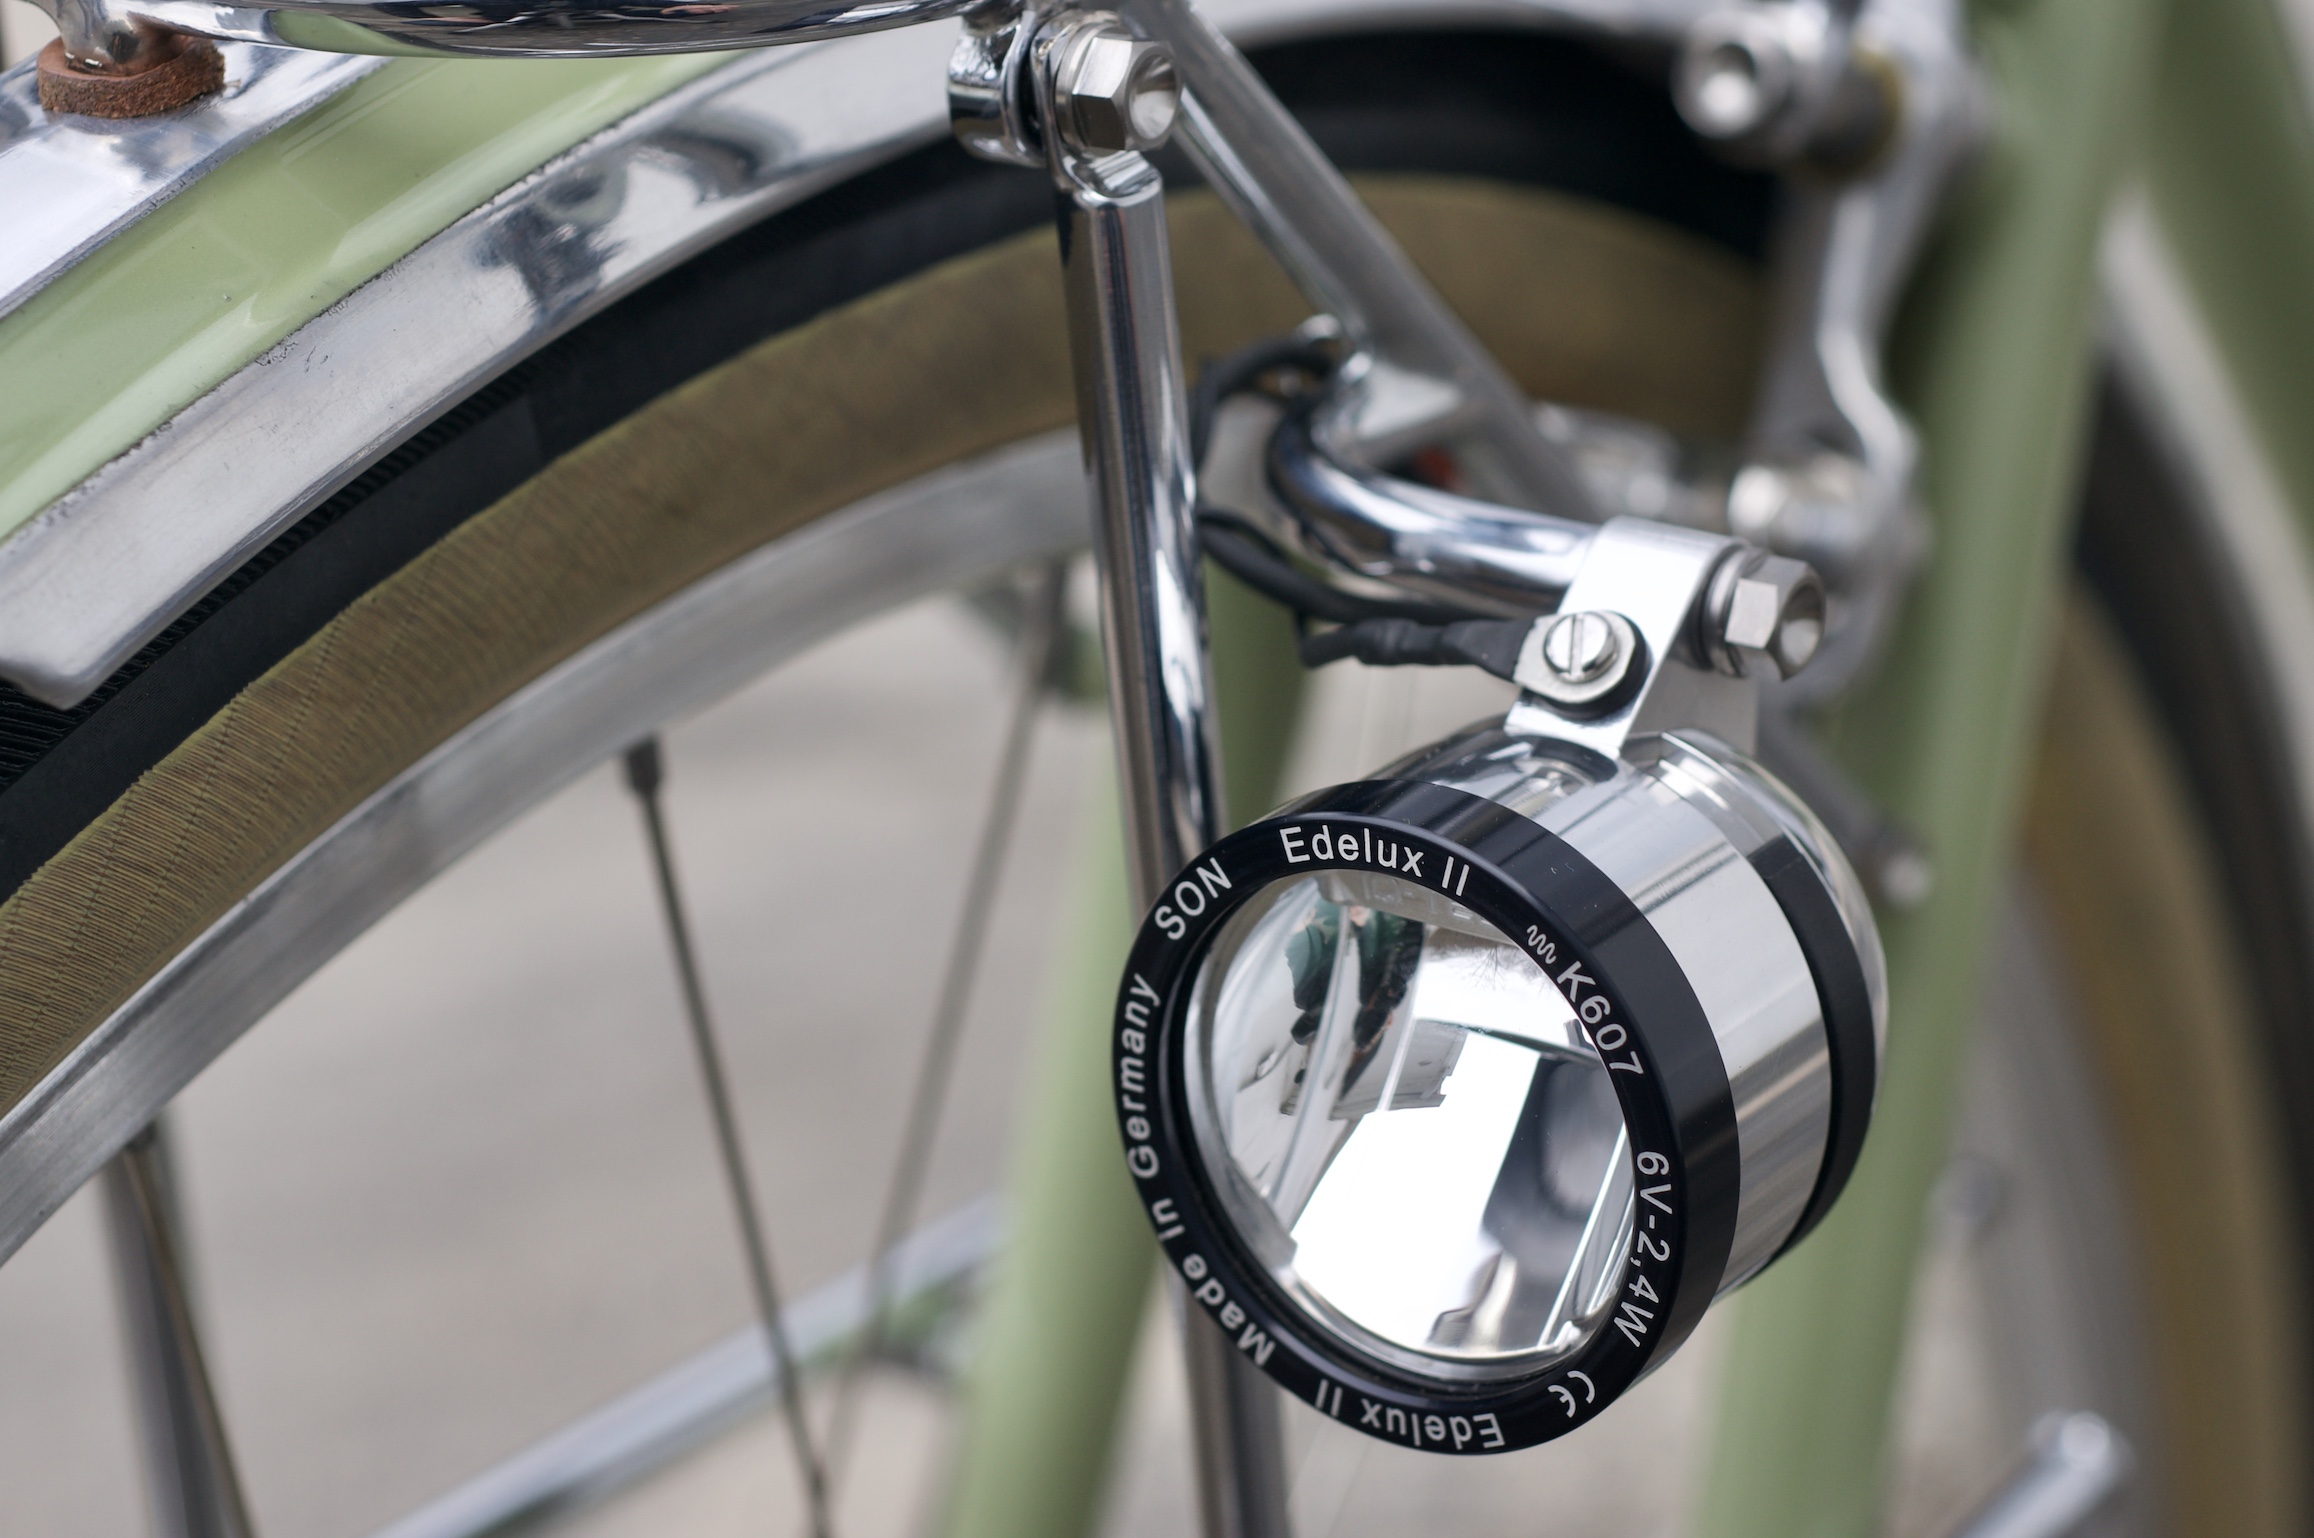
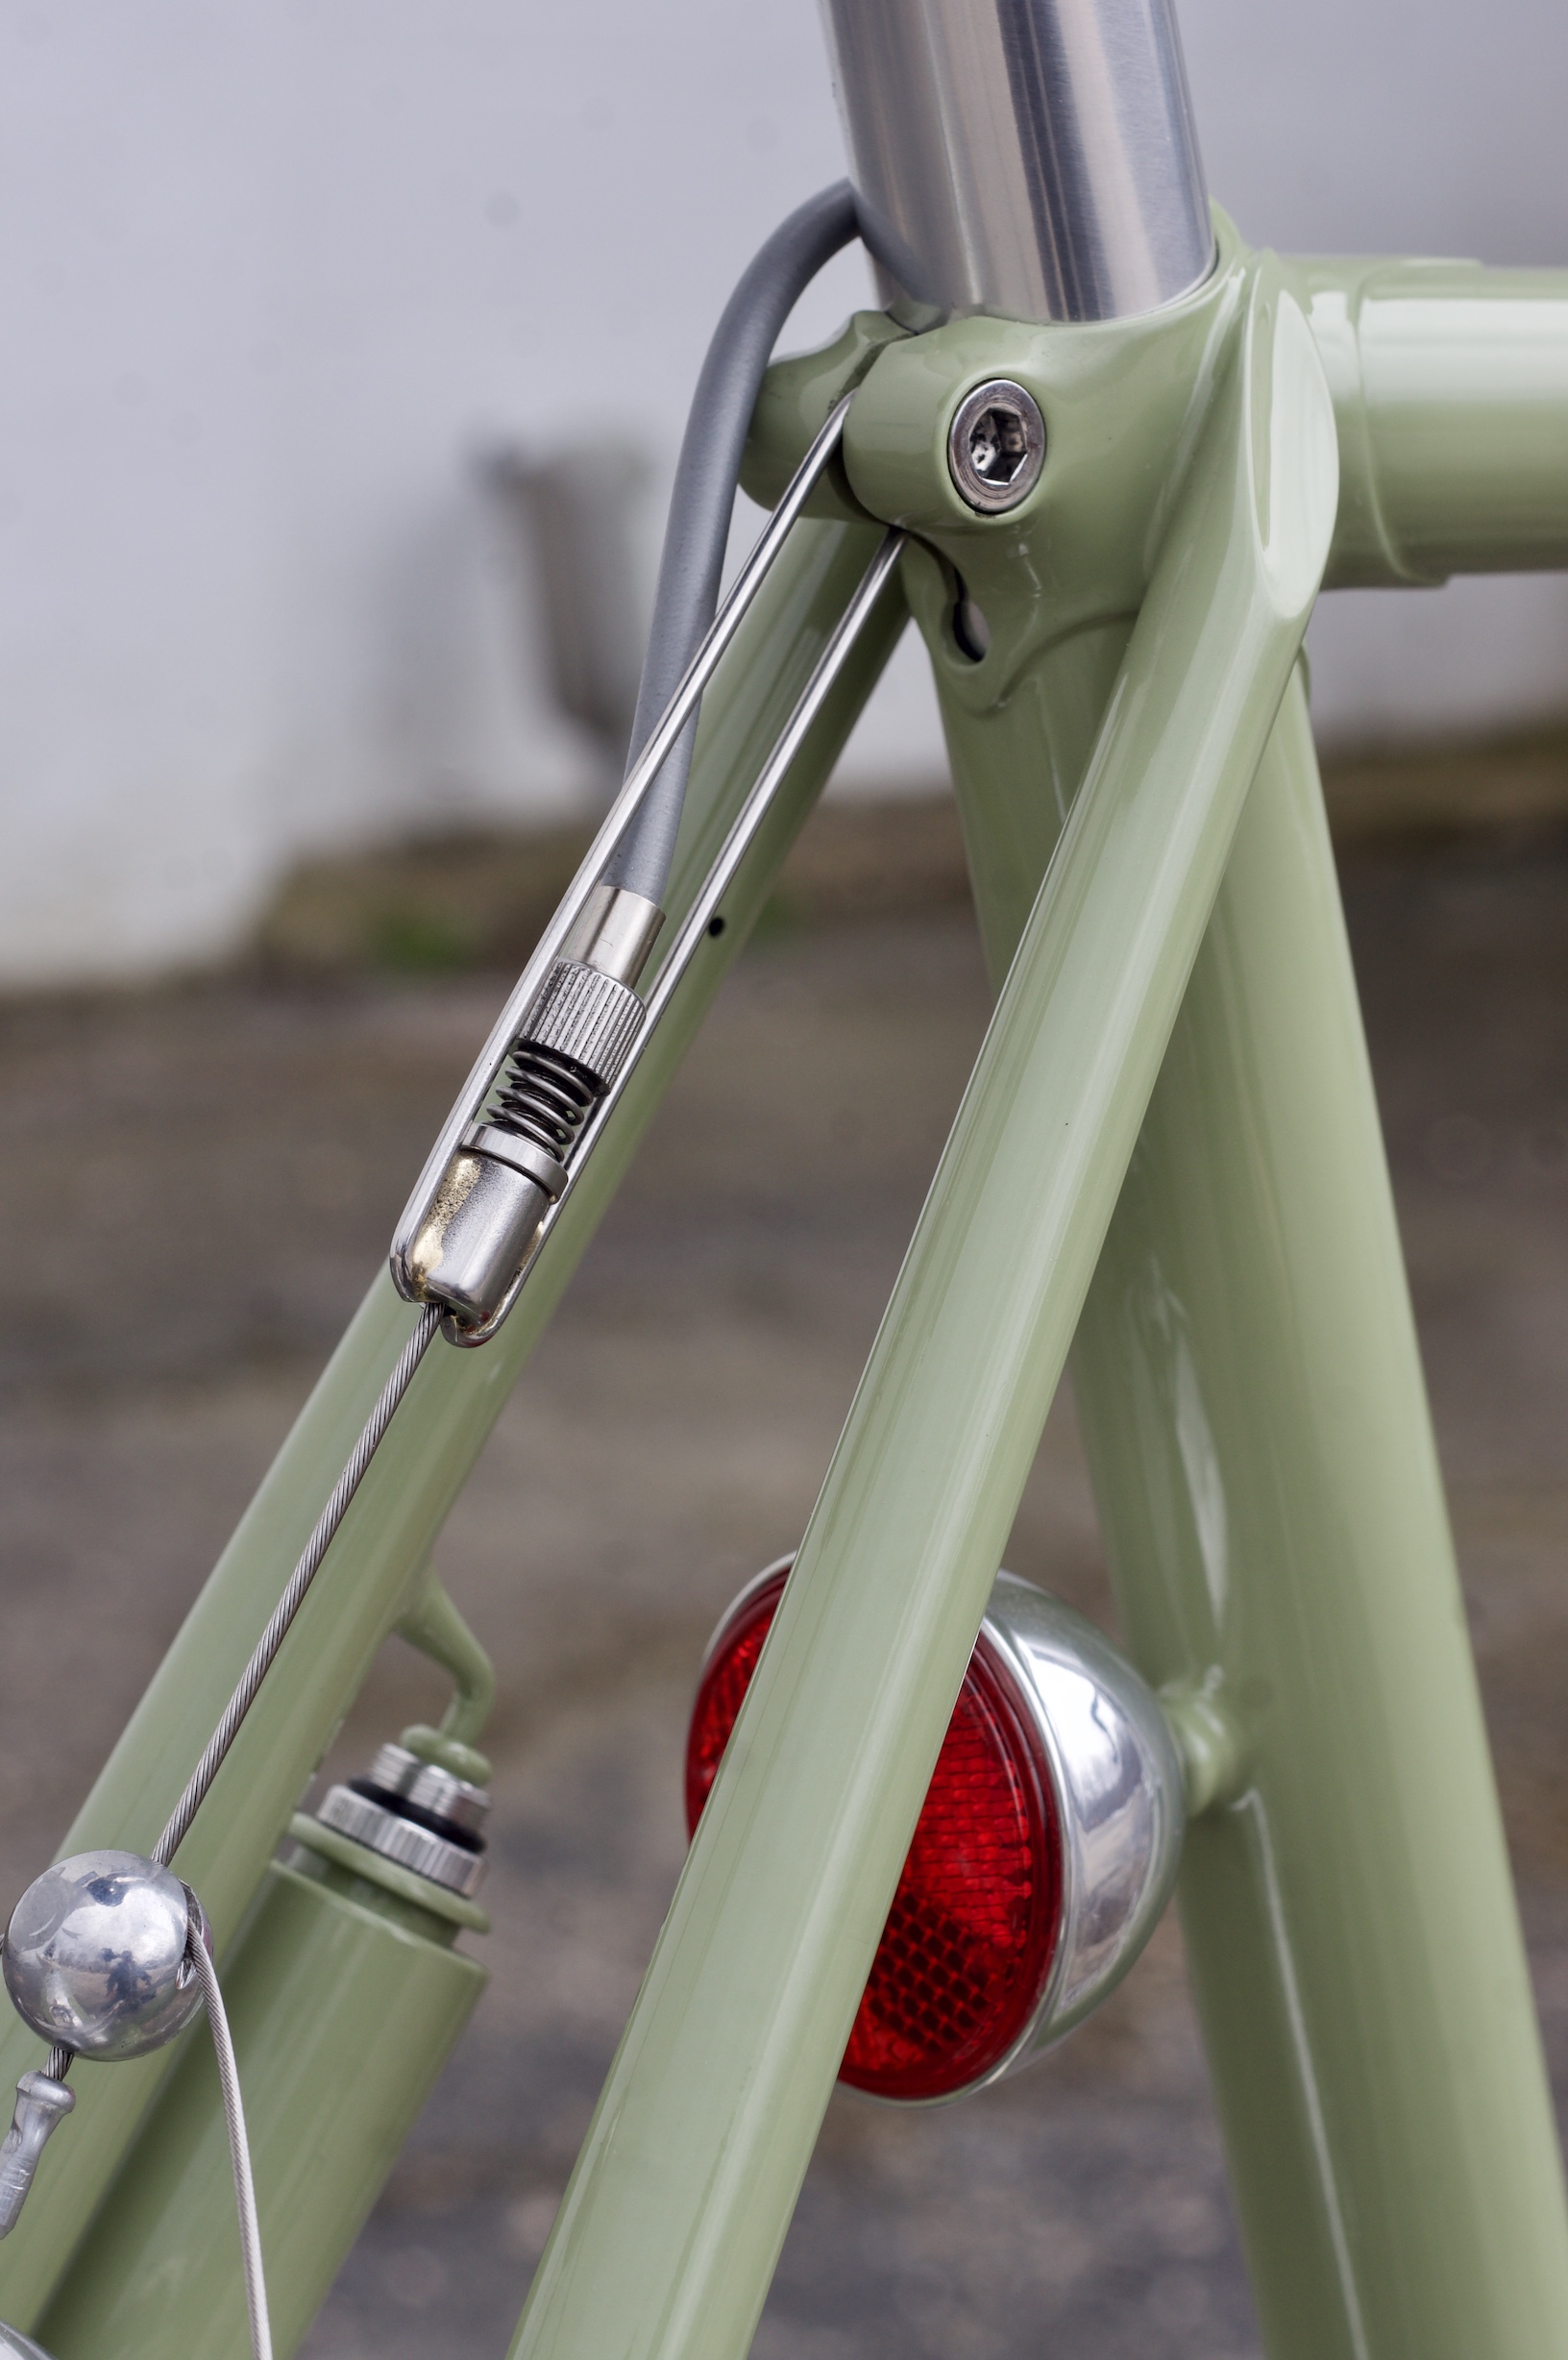
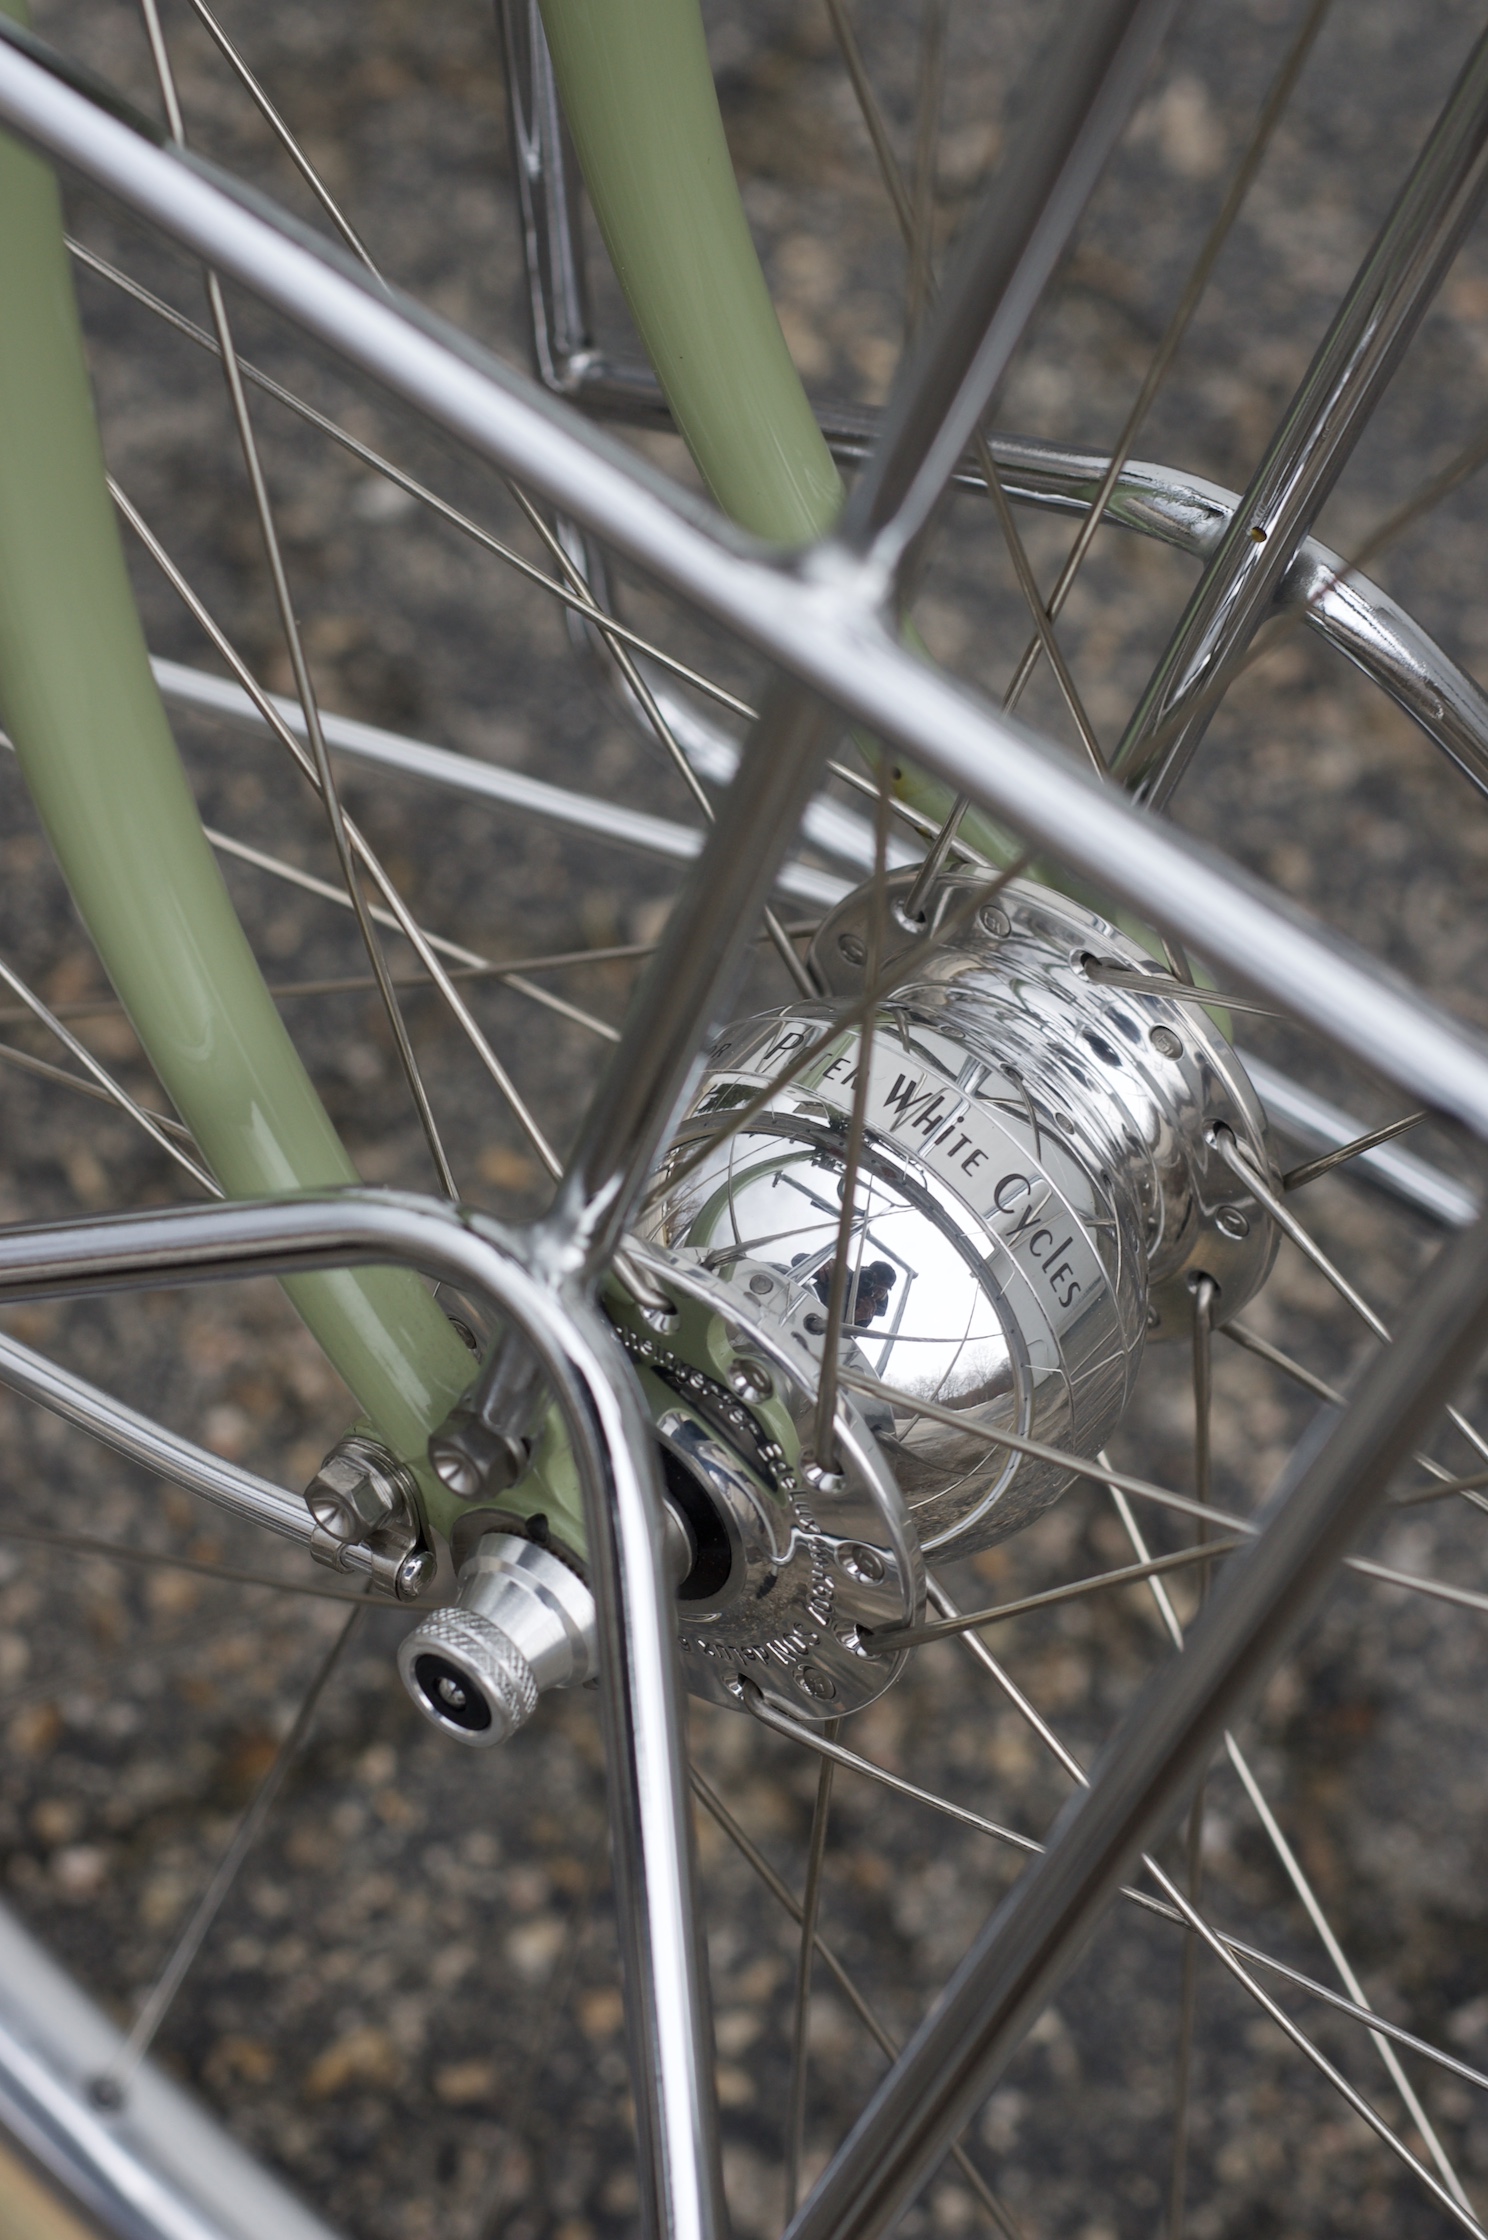
- There is a single taillight wire that needs to be unplugged before taking the bike apart but the dynamo is the Schmidt SL connector-less style so no wires to tend to there.
- I made a small 32mm headset/8mm socket/8mm hex tool for easy disassembly and reassembly of the bike.
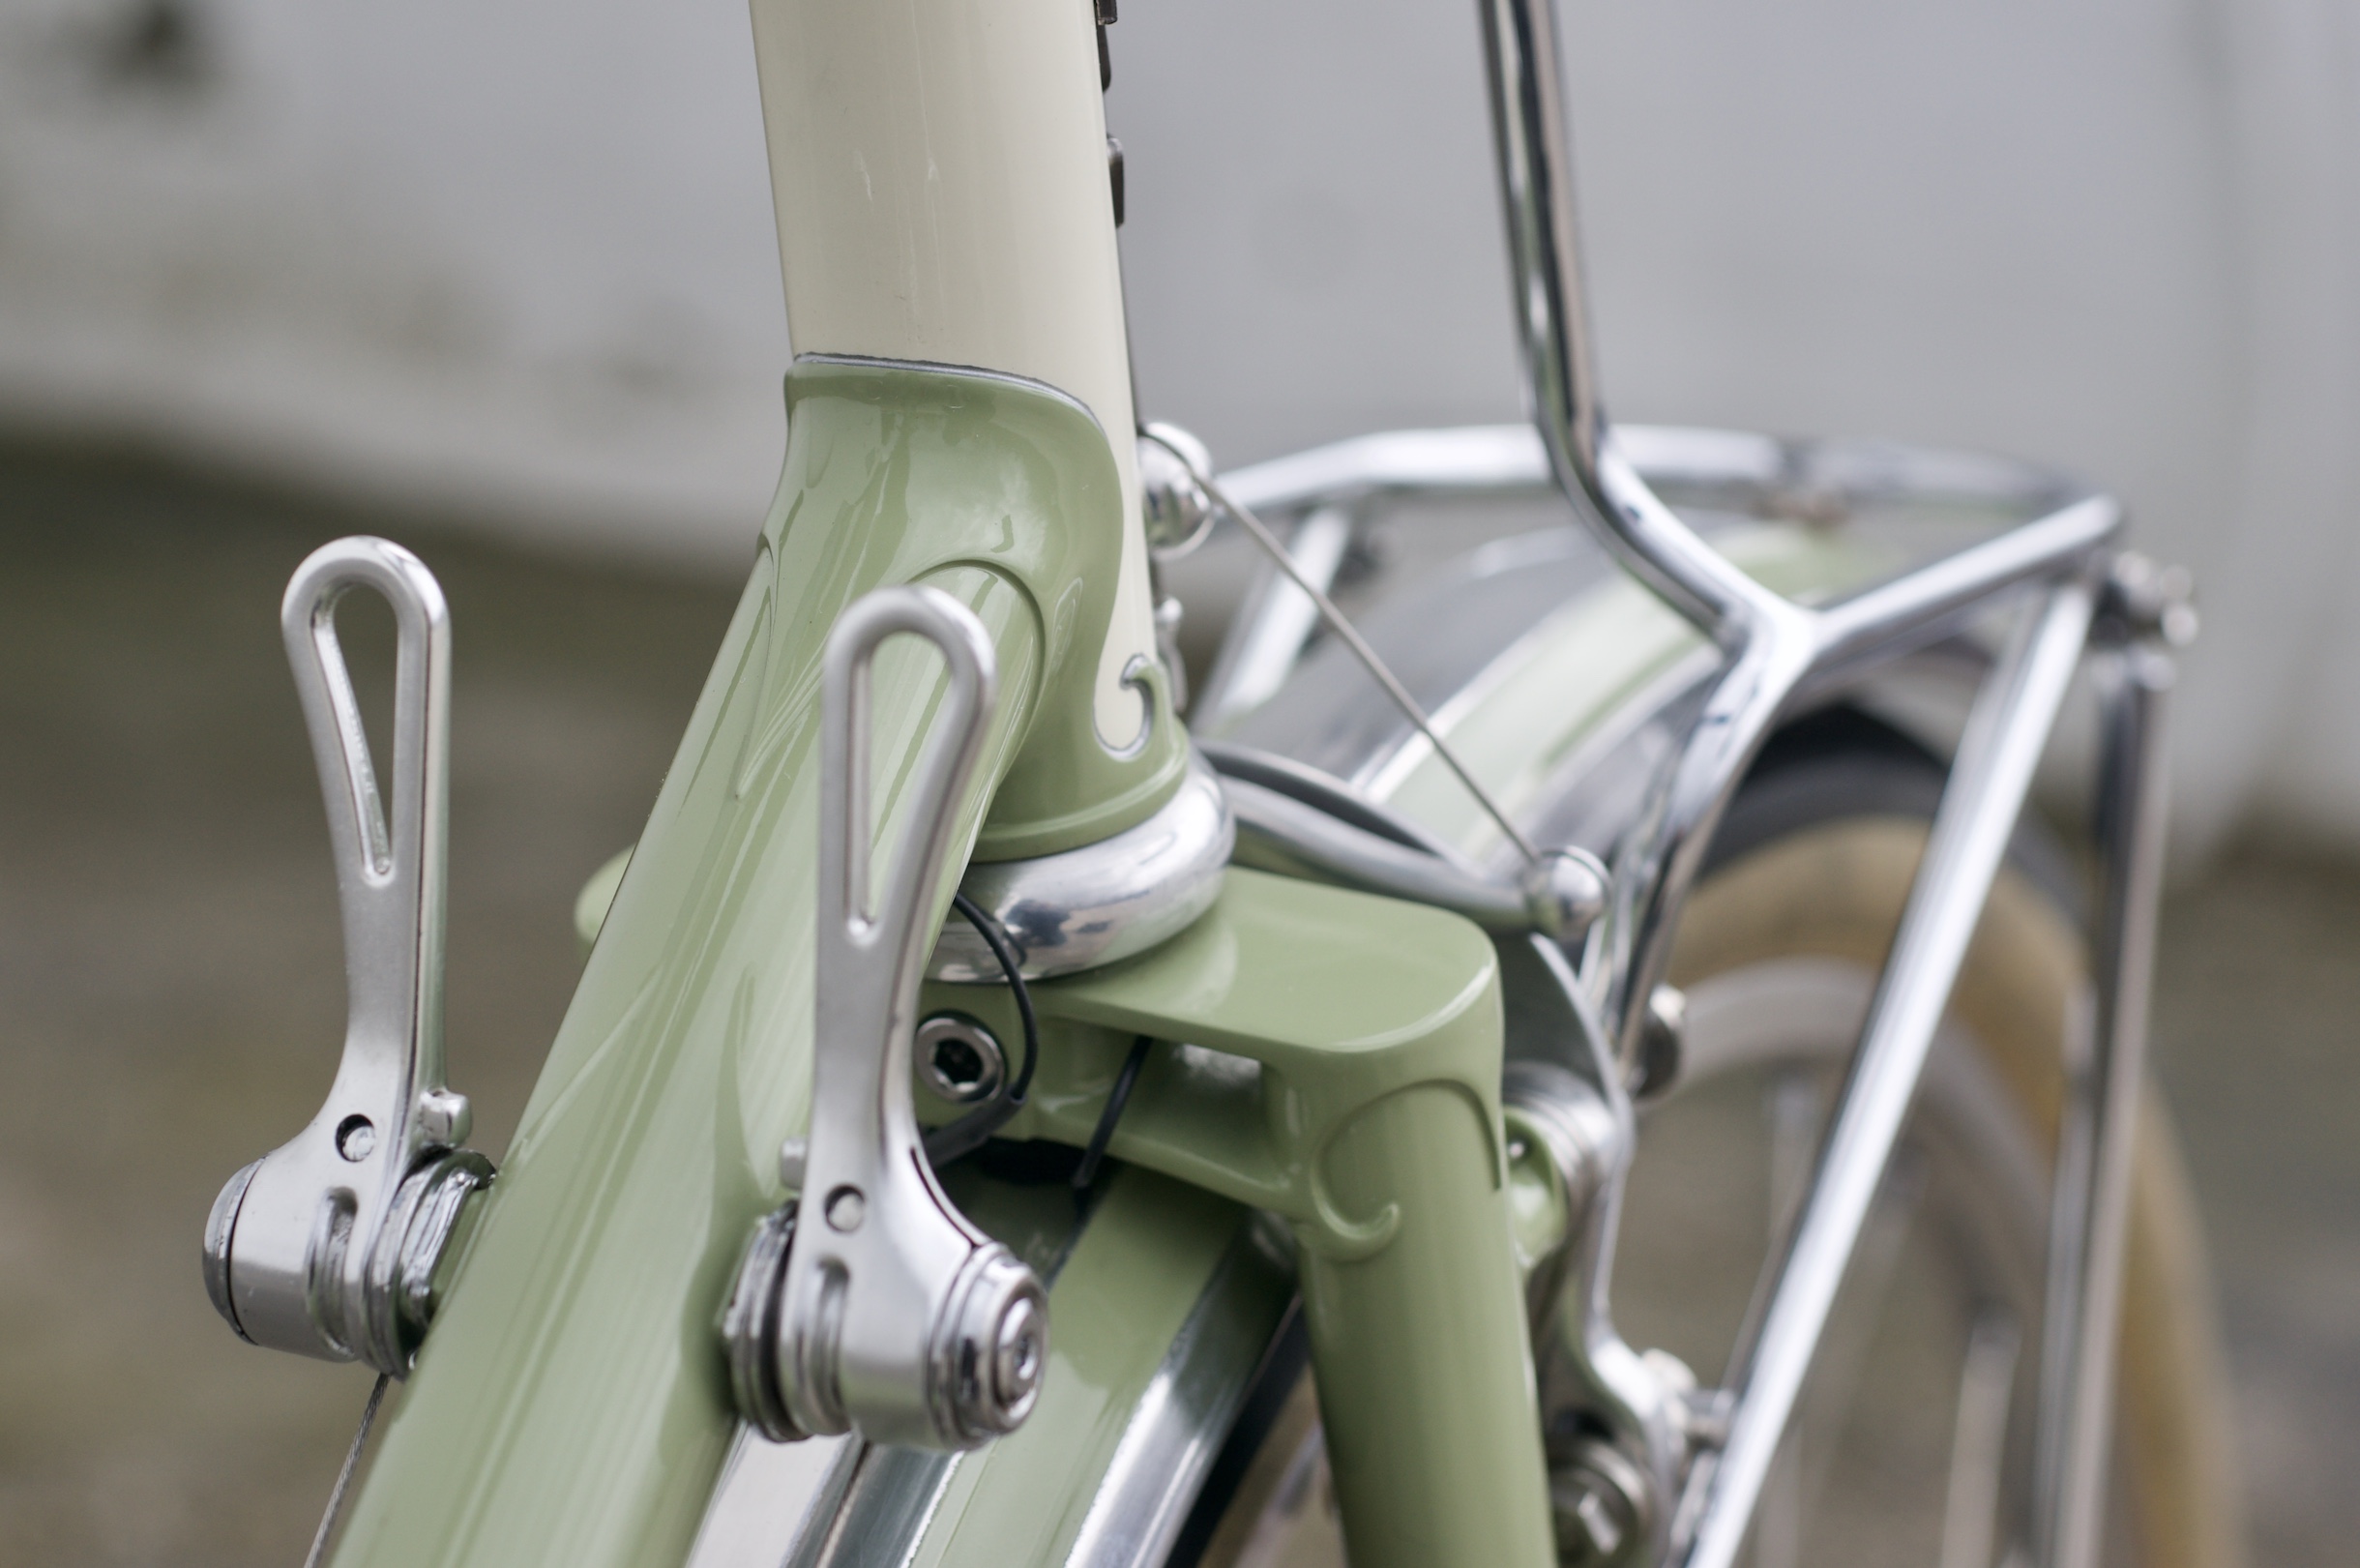
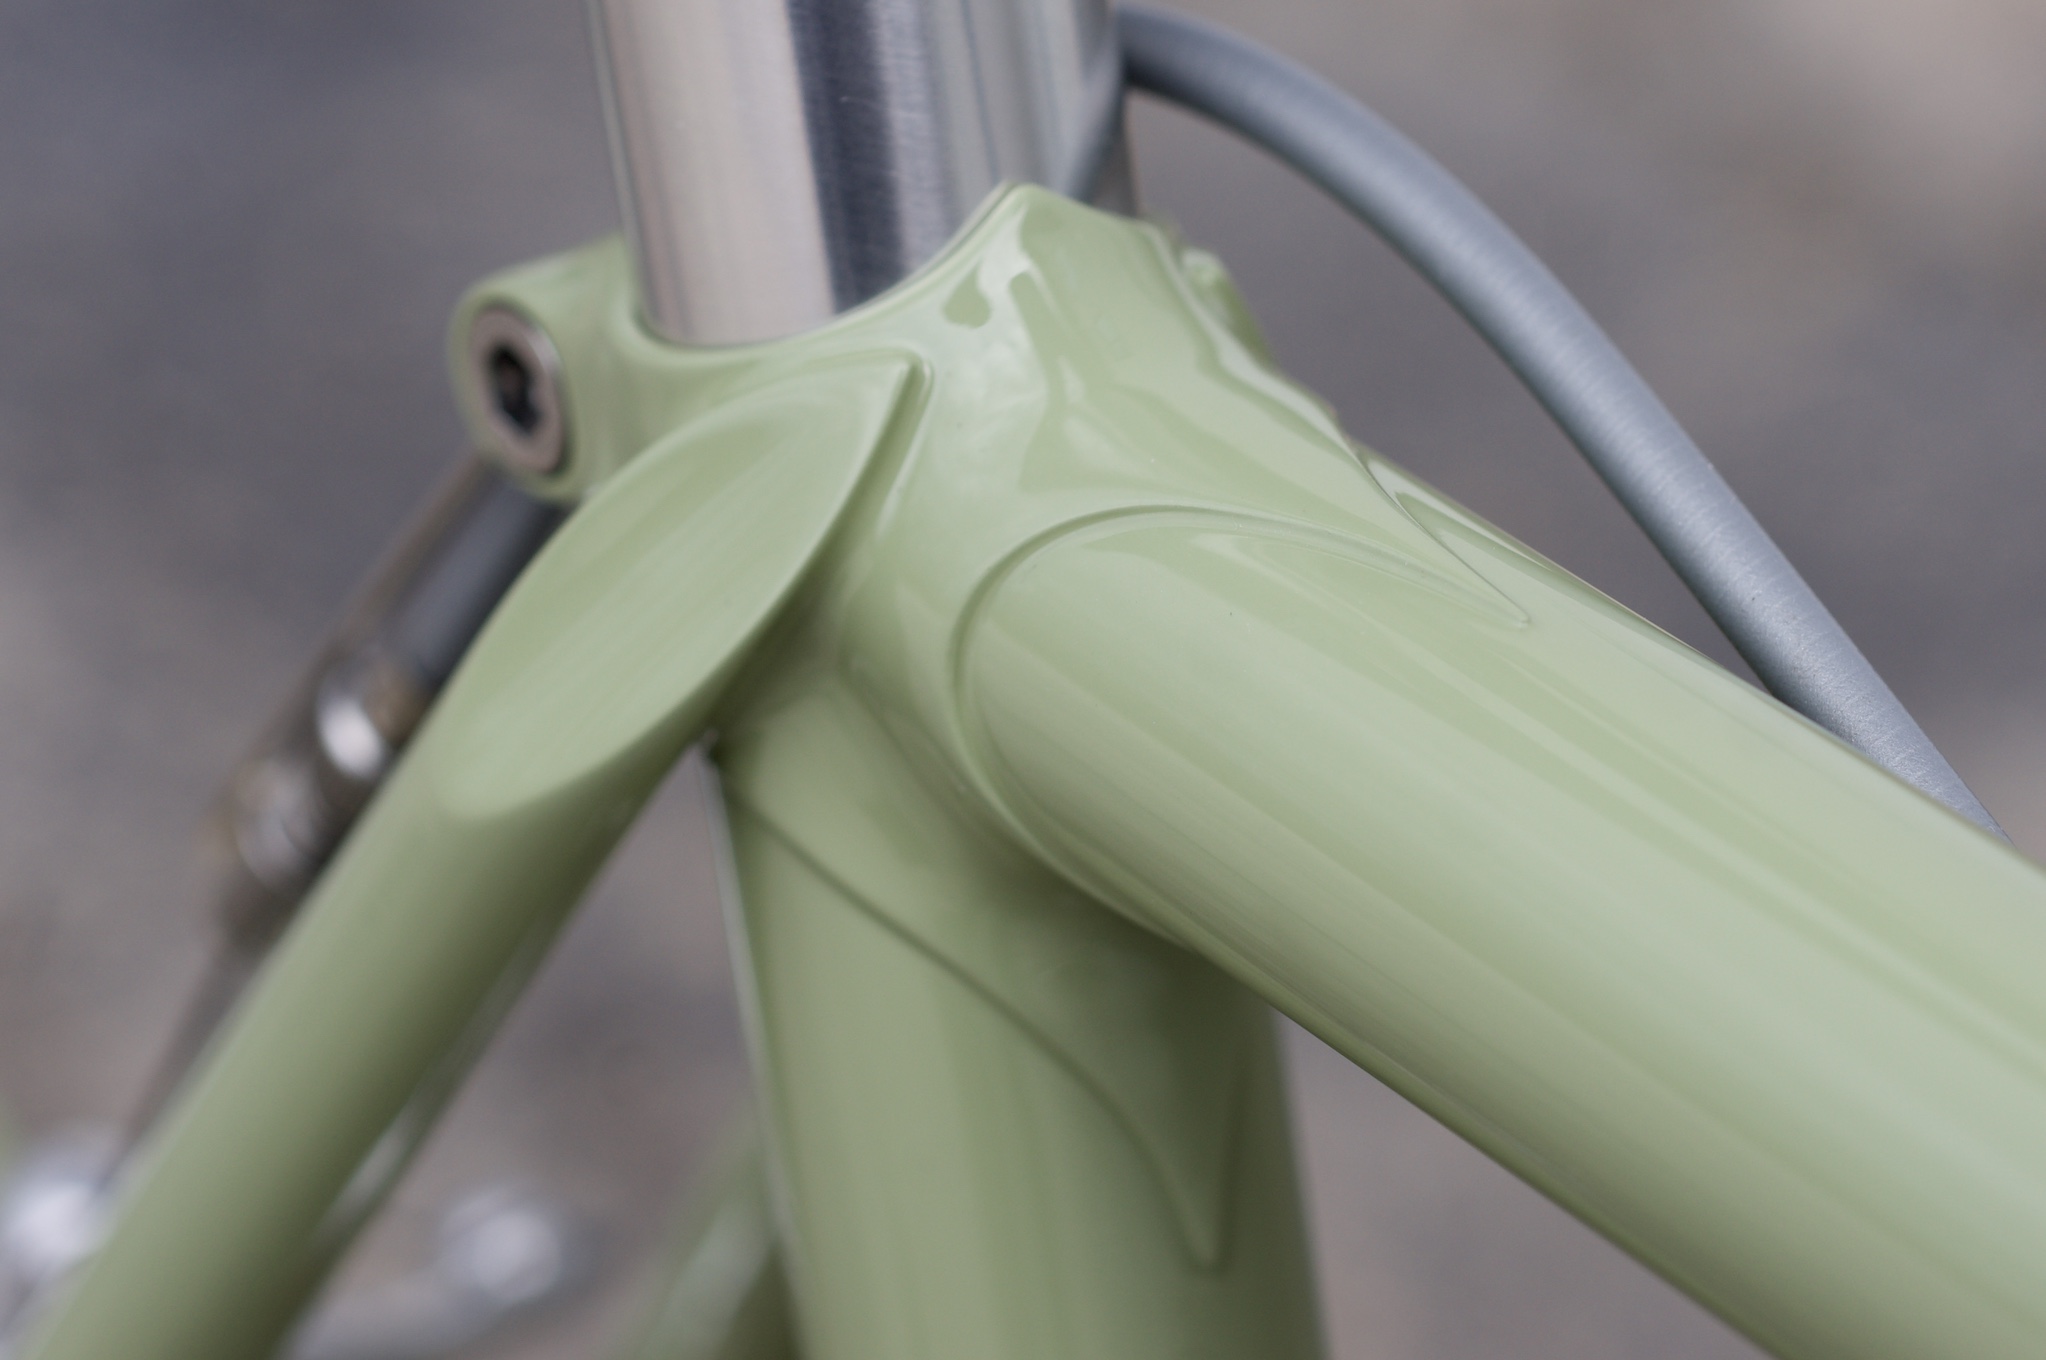
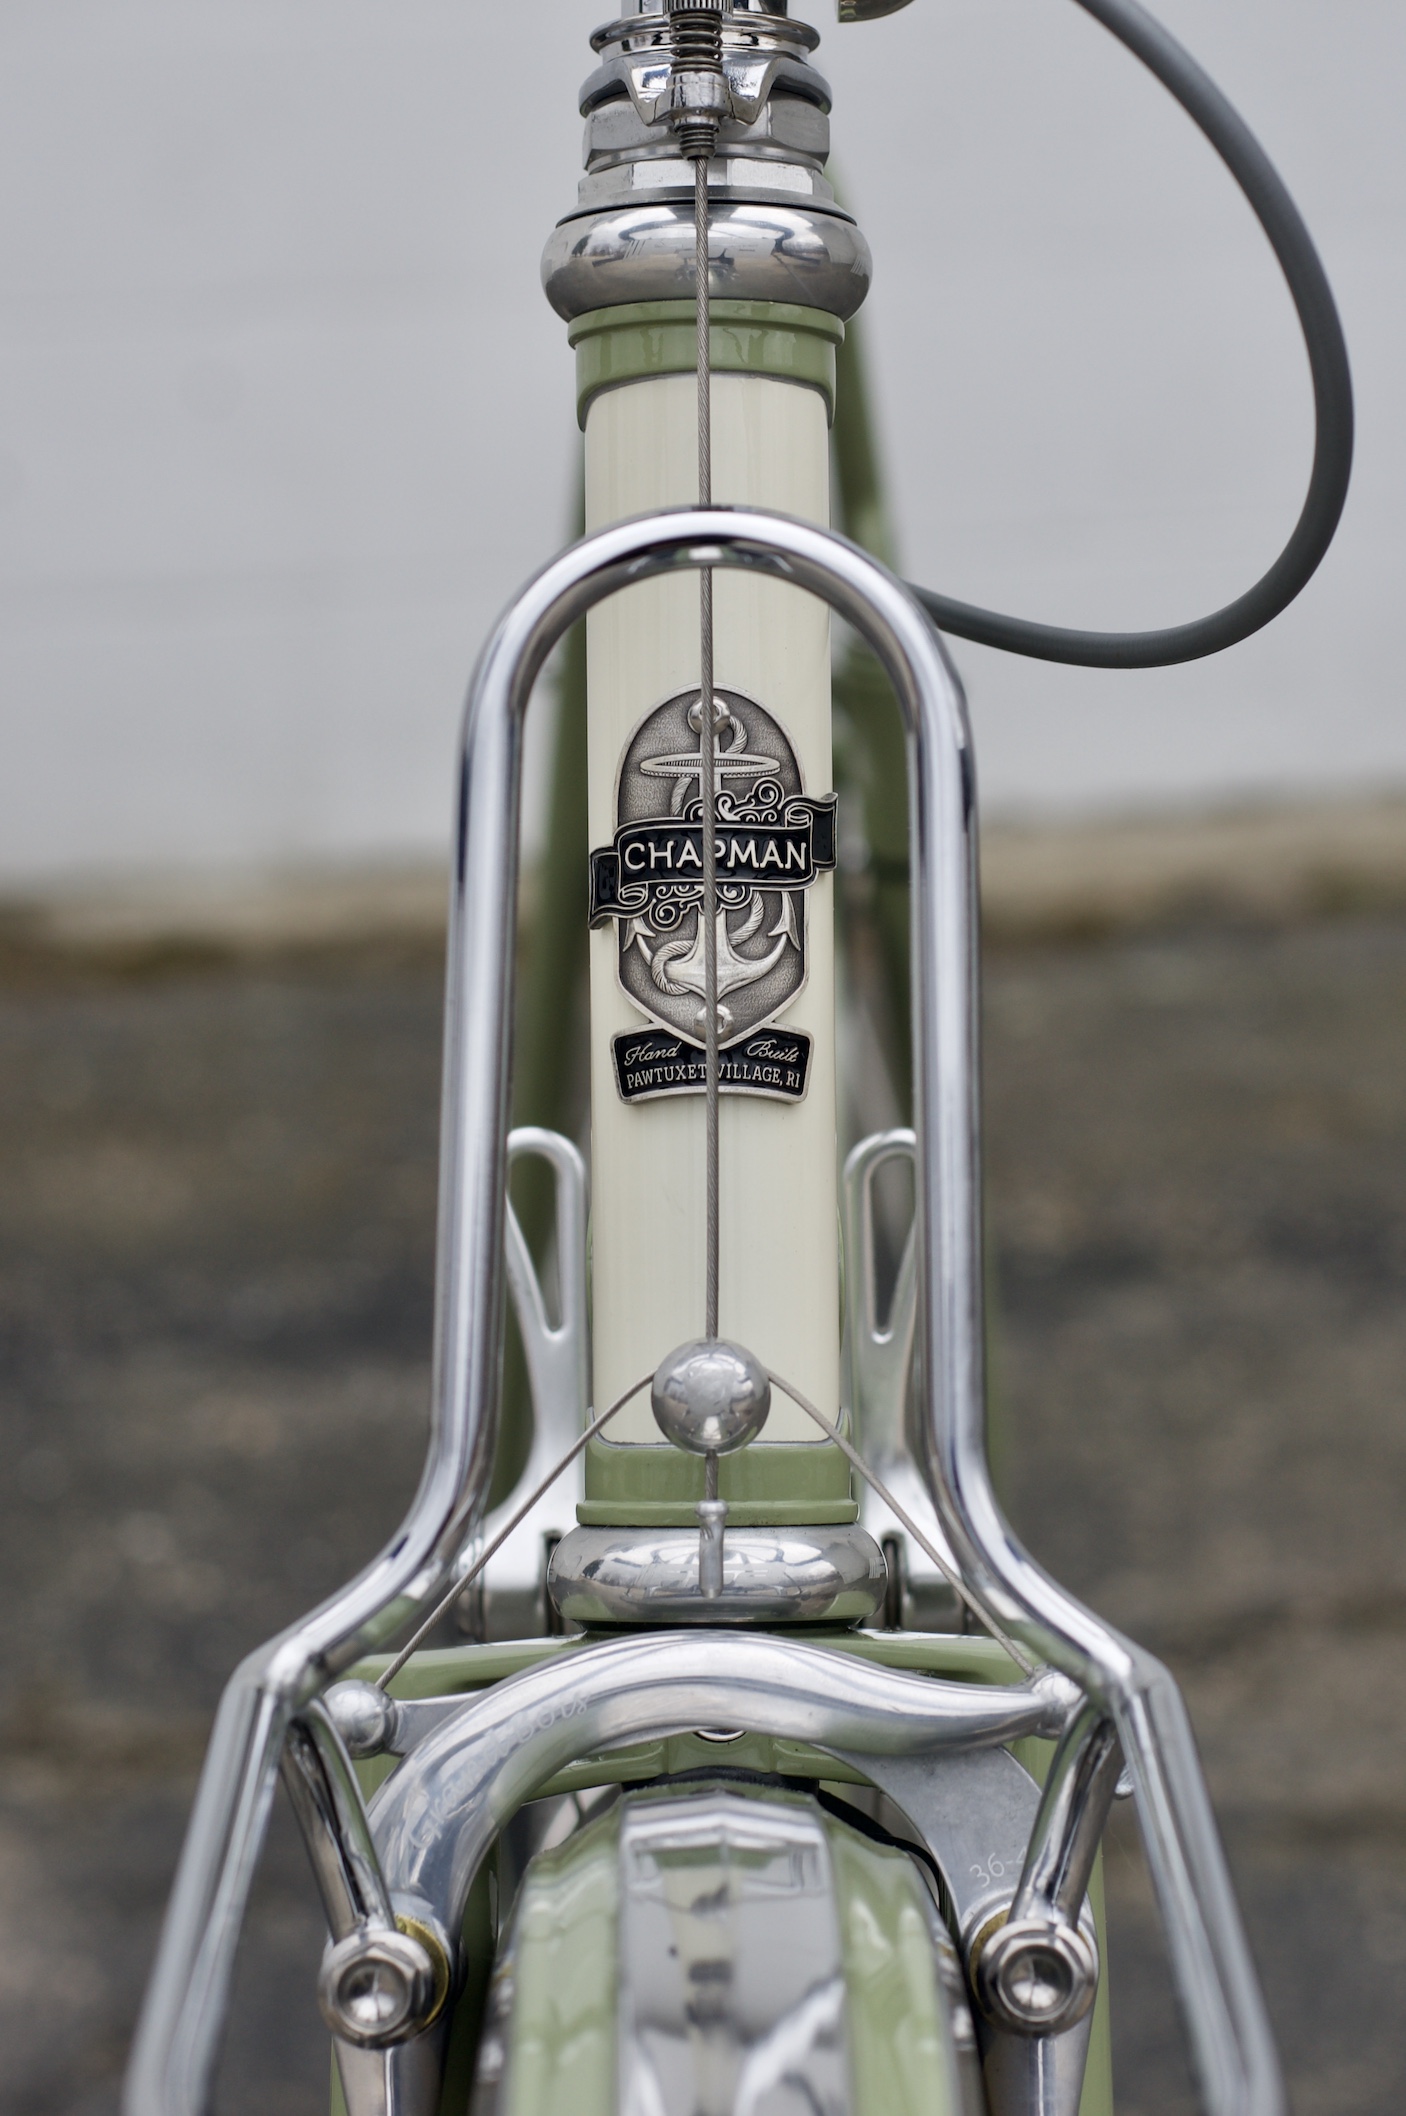
- To get the saddle height right every time, I machined a small spacer that sits on the inside portion of the seat tube mounted taillight. That idea gets credited to J.P. Weigle.
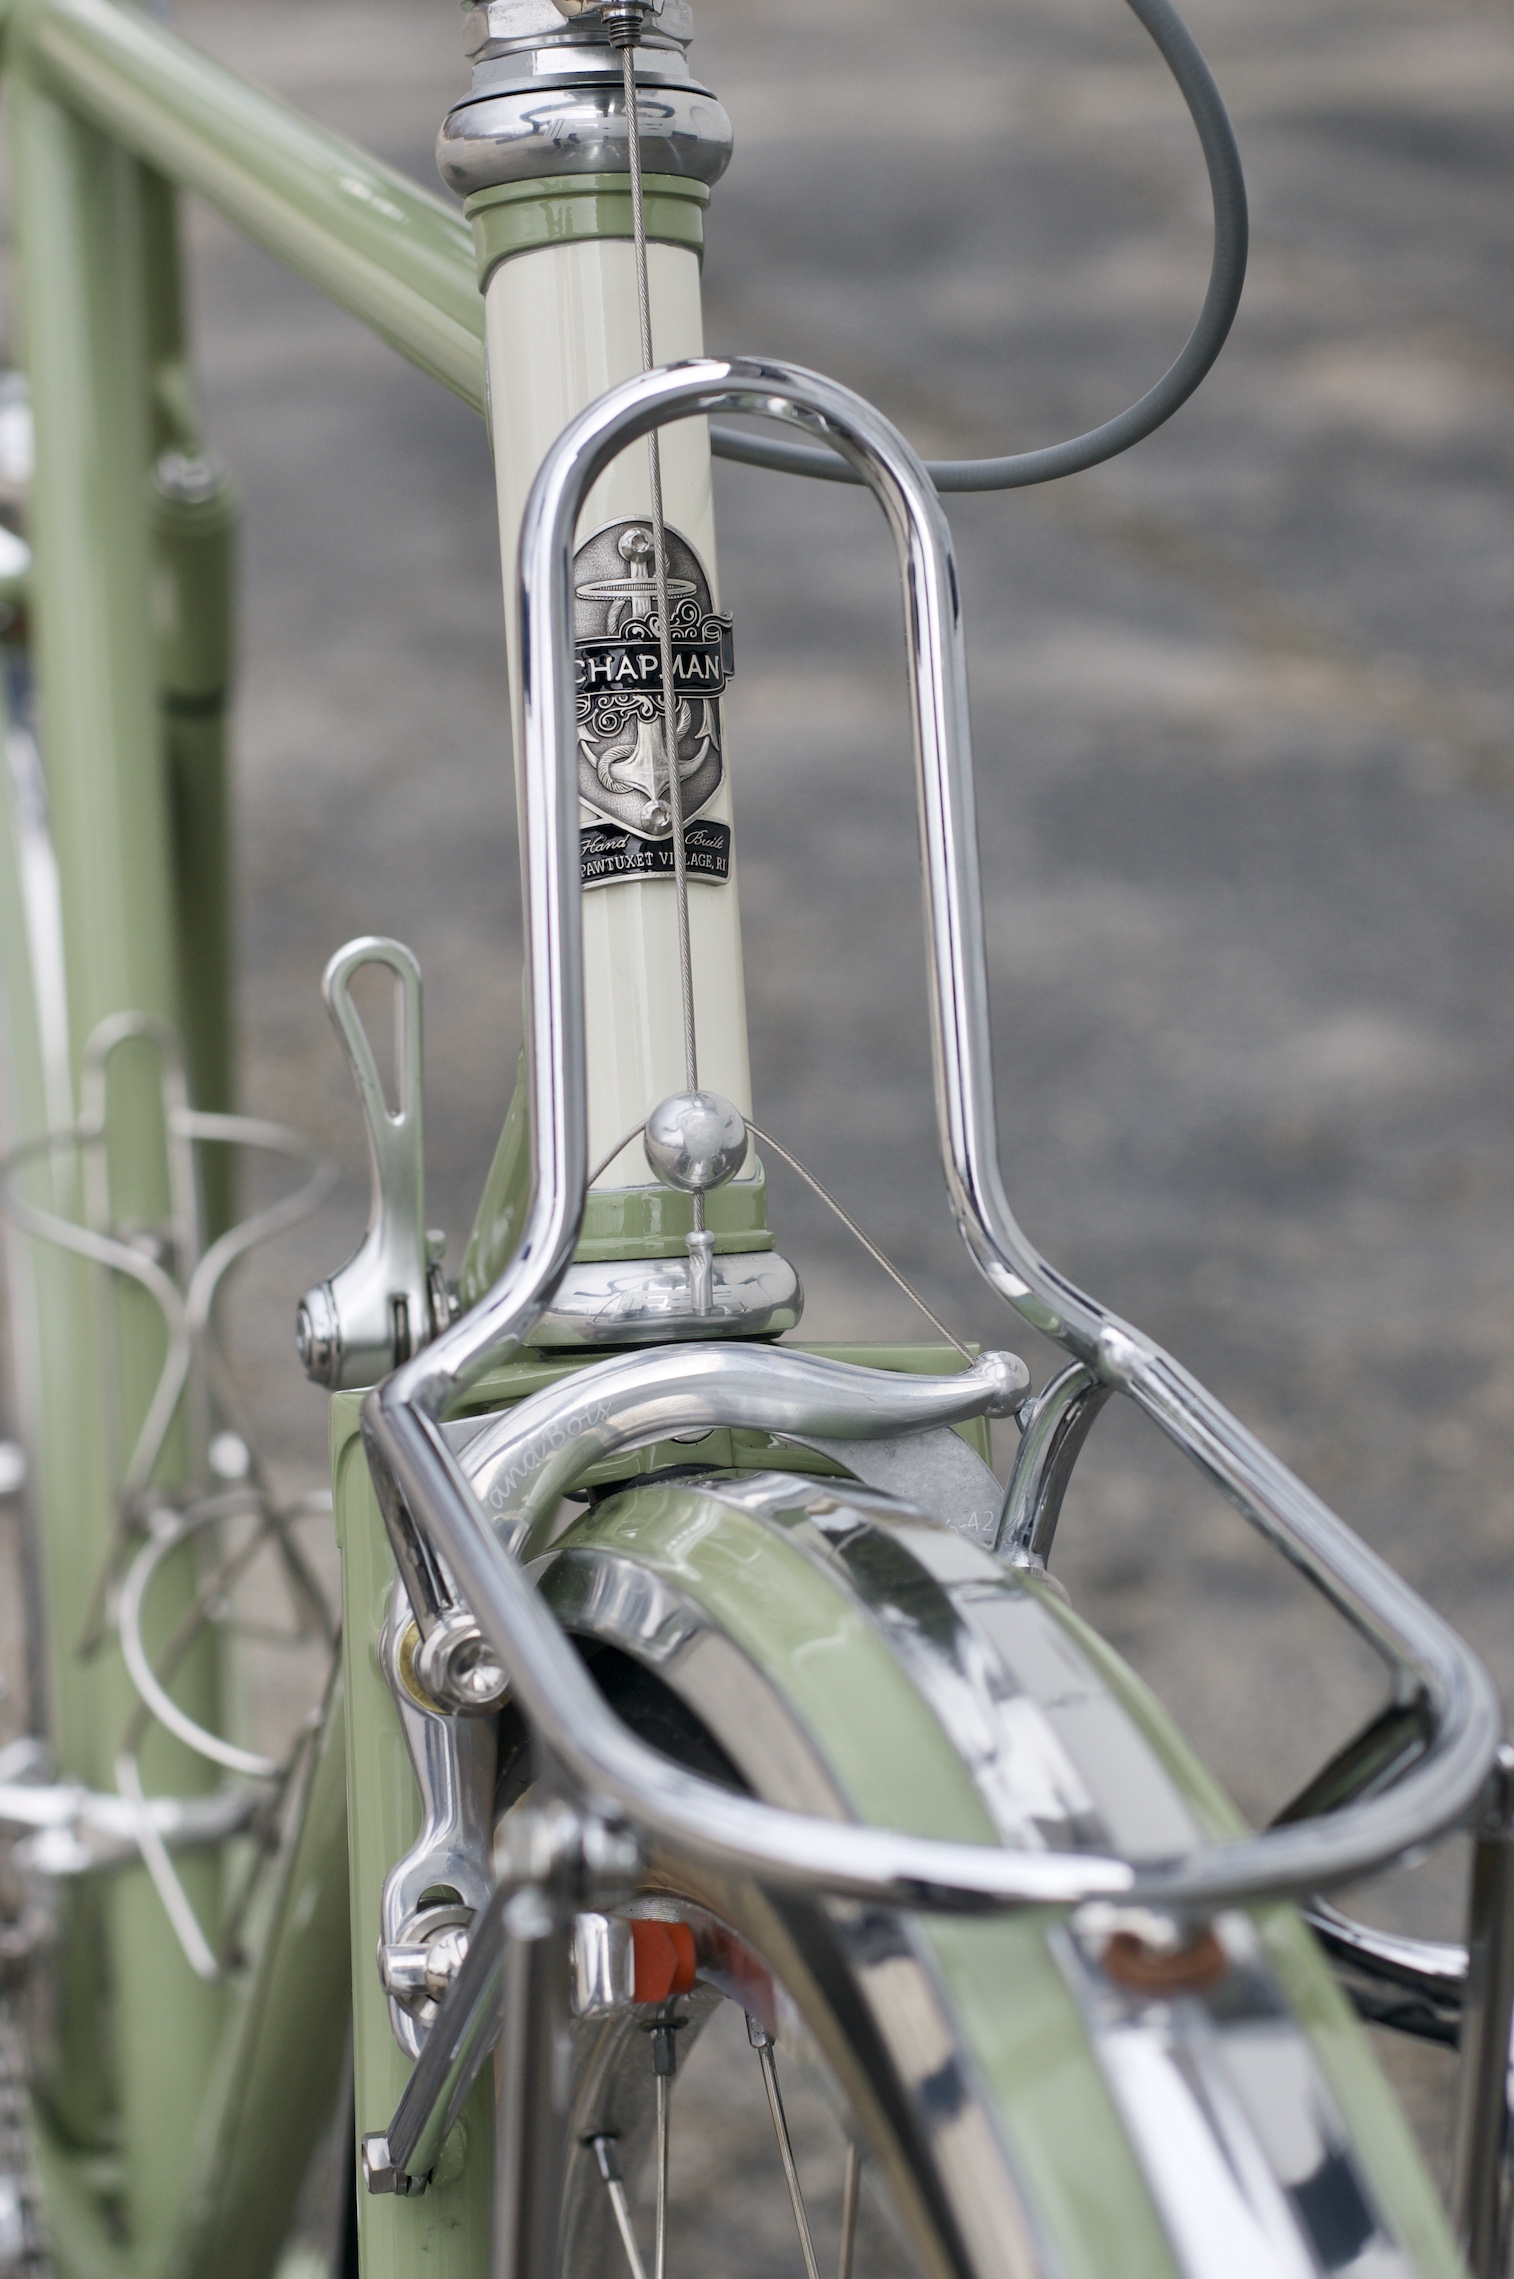
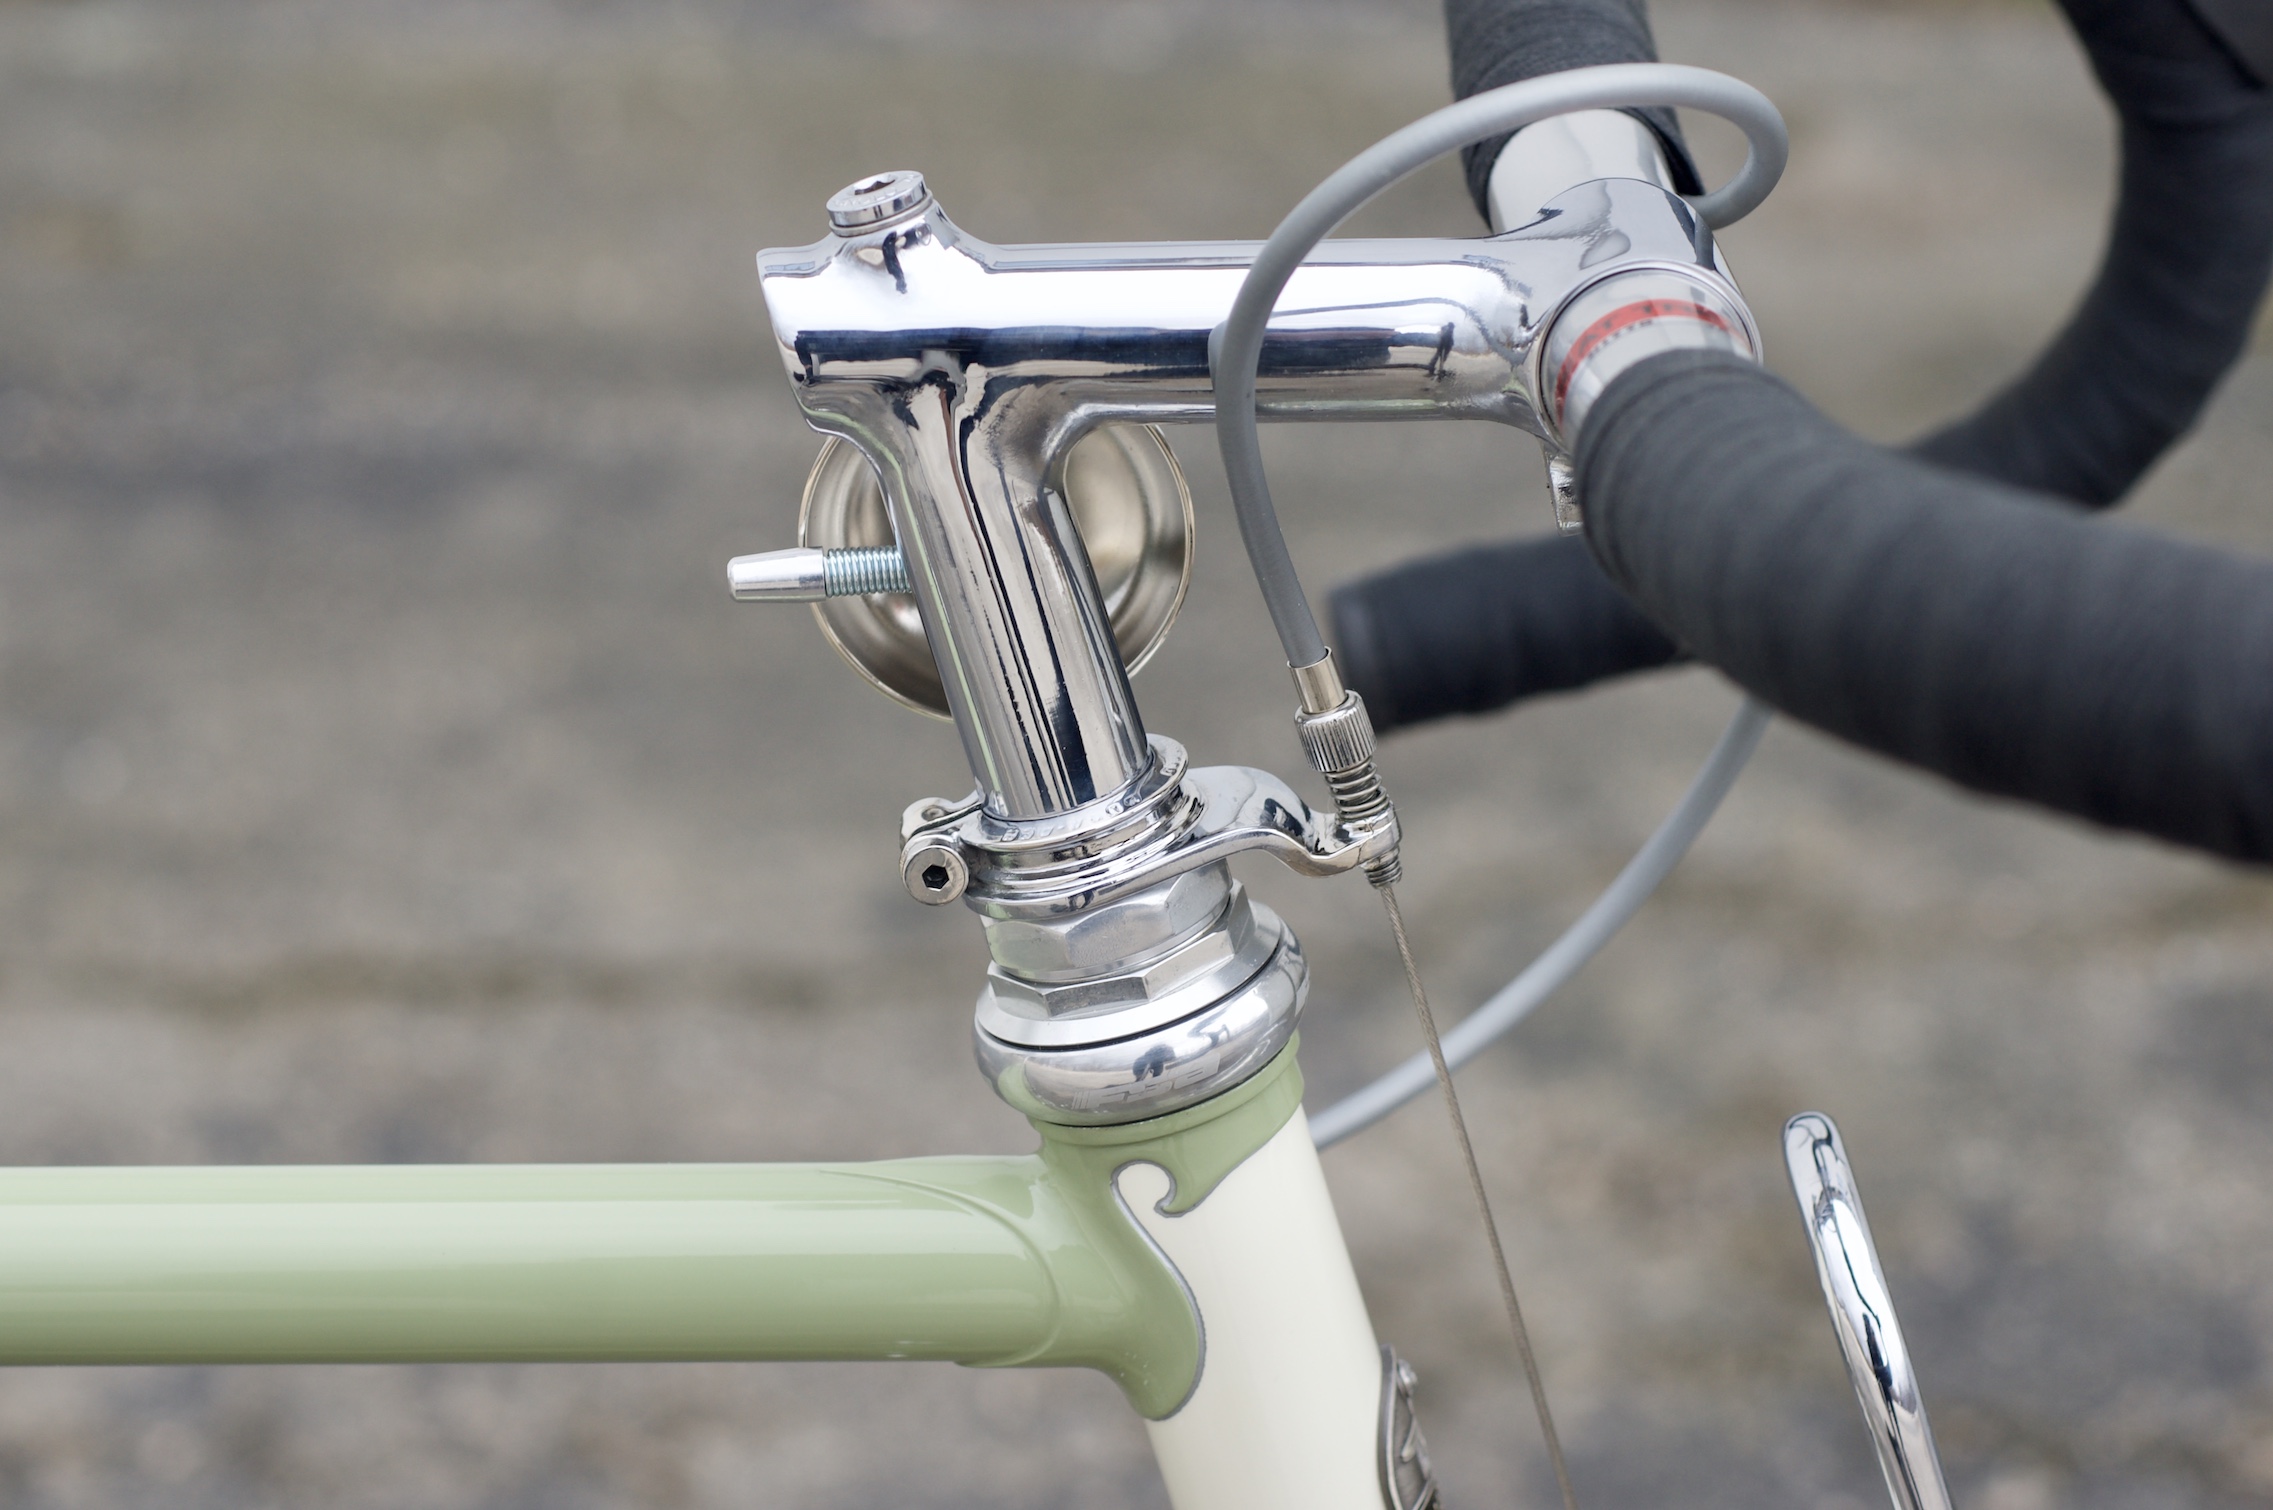
- There is also a custom made front cable hanger that similarly puts the bars at the correct pre-set height every time.
- The stainless custom rear hanger has an adjuster and slot for cable removal.
- The fender cut was as clean as I could have hoped. It was my first time Rinko’ing a fender and I was just following the leads of other reputable builders and how they handled it.
There’s a short video in this Instagram post of me reassembling the bike for those of you who would like a visual. I like the way this bike came out and have a sneaking feeling that it won’t be the last time I build a rinko friendly bike.


Greg Halliday
March 29, 2024 @ 4:57 pm
I guess that’s not too bad for your first one…Just kidding. +1 on every thing. Ive seen quite a few of this style bike over the years but this has to be the best/nicest example of a rinko Ive ever seen. It’s almost too nice to think about folding up and throwing in a bin.
Brian
April 1, 2024 @ 10:11 pm
Haha, thanks!
Erik Sandblom
December 12, 2022 @ 1:58 pm
That’s a lovely bike. When you put it together, is there a mechanical stop when the handlebar is straight? Or do you have to eyeball it? When I put a handlebar on a bike, I always find it tricky to get the handlebar to align nicely with the front wheel.
Brian
December 27, 2022 @ 5:03 pm
No, the bars are set straight usually by lining the bar up with the fork crown or front axle from above.
Bruno
March 10, 2021 @ 3:34 pm
Congratulations.I like your bicycles very much. You’re an artist!
Brian
February 28, 2024 @ 2:50 pm
Thanks!
June
November 10, 2020 @ 3:06 pm
Thank you Brian! The beginning of 2020 was unfortunate timing for a new travel bike, but I promise I’ll put your thoughtful rinko details to good use in years to come.
Brian
November 10, 2020 @ 6:42 pm
Yeah, 2020 has been a rough for traveling (among other things). I’m excited to hear about your travels when the time comes!